Raspberry Pi:VirtualBoxを使って死んだSDカードからリカバリー
- created
- 2017-02-02
- last change
- 2017-06-17 01:19:04 +0000
きっかけ
家で半年くらい動いていたRaspberry PiのMicro SDが死んだ。 原因は誤って起動中にSDカードを抜いてしまったことだろう。確実に。
壊れ方がおもしろくて、カードの内容はちゃんと読める。 起動はするのだが、書き込めない。ファイルの更新とかが一切反映されない。
不幸中の幸い、ある時点までのデータは読めるのでこれを元にバックアップを取り、 新しいMicro SDにコピーすることにした。
参考
- MacでRaspberry PiのSDカードをハードコピー(バックアップ)
- 5 Seasons: Macでddコマンド。
- Raspberry Piで大きな容量のSDカードから小さな容量のSDカードへまるごとコピーする
- VirtualBox | saito’s memo
- Fix the apt-get install error: “Media change: please insert the disc labeled …” on your Linux VPS
- SourcesList - Debian Wiki
リカバリー方法
Raspberry Piのデータを抜き出して新しいMicro SDにコピーするのだが、 新しいMicro SDの容量が元のMicro SDより少しでも小さいとコピーできない。
コピーするためにMicro SDのデータに作られているパーティションのサイズを変更しなければならない。
パーティションを変更する方法として、VirtualBox VM上のDebianでGPartedを動かすことにした。
VirtualBoxでRaspberry PiのSDを読めるようにしなければならないため、 途中SDから抜き出したデータをVirtualBoxのディスクデータに変換しなければならない。
また、復元先のMicro SDに正常に書き込めるように、復元先と同じサイズかそれ以下のディスクイメージを作る必要がある。 もちろん、こちらもVirtualBox用ディスクデータから変換する。
結果、ざっくりとした手順はこうなる。
- Micro SDからRaspberry PiのRAWデータを抜き出す
-
ddコマンドで抜き出す
-
- Raspberry PiのRAWデータをvdiファイルに変換する
-
VBoxManageを使う
-
- 復元先のMicro SDのイメージを用意する
- こちらも空の状態で一旦
ddで抜き出した
- こちらも空の状態で一旦
- 復元先のデータをvdiファイルに変換する
- VirtualBoxにDebianを用意する
- osboxes.orgのvdiデータを利用した
- Raspberry Pi、復元先のディスクをDebianに追加する
- Debianにgpartedをインストールする
-
/etc/apt/sources.listを変更する - Debianを最新の状態にする
- gpartedをインストールする
-
- Raspberry Piのパーティションサイズを変更する
- Raspberry Piのパーティションを復元先のディスクにコピーする
- 復元先のサイズにパーティションを拡張する
- 復元先のvdiファイルをディスクイメージに戻す
- 復元先のディスクイメージをMicro SDに書き込む
- こちらも
ddコマンドを用いる
- こちらも
Micro SDからRaspberry PiのRAWデータを抜き出す
まずはRaspberry Pi のMicro SDがどこに割り当てられているか確認する。
確認方法は、Macではdiskutil listが利用できる。
diskutil list
---
/dev/disk2 (external, physical):
   #:                       TYPE NAME                    SIZE       IDENTIFIER
   0:     FDisk_partition_scheme                        *7.9 GB     disk2
   1:                 DOS_FAT_32 boot                    78.6 MB    disk2s1
   2:                      Linux                         7.9 GB     disk2s3
今回の場合/dev/disk2がRaspberry PiのMicro SDだった。
ディスク番号が判明したところで自動マウントされているbootをアンマウントする。
diskutil unmount /Volumes/boot
Volume boot on disk2s1 unmounted
アンマウントできたので、データを吸い出す。
イメージ読み出し
以下は/dev/disk2がSDドライブの場合の例。以下のコマンドでSDカードの中身をRPi.imgというイメージファイルに読み出します。
$ sudo dd if=/dev/disk2 of=~/RPi.img
でも、Linux君達とは少し違うところもあるようで、
Ritsu:Desktop tetsu$ dd if=/dev/zero of=test bs=1M count=10
dd: bs: illegal numeric value
と怒られてしまいました。(;´Д`)
10MBのデータファイルを作成する場合は、
% dd if=/dev/zero of=test bs=1024000 count=10

10+0 records in
10+0 records out
10240000 bytes transferred in 0.105885 secs (96708667 bytes/sec)
ということなので、こうする。
dd if=/dev/rdisk2 of=~/backup.img bs=1024000
/dev/disk2 ではなく /dev/rdisk2 にしている。ディスク番号の前に r をつけると Raw状態で読み書きができるようになる。 r なしの場合、OS側が安全に読み書きできるように 余分な処理を入れるため遅い。
小さいMicor SDへ移行するための加工
今回は、16GBのSDカード(実際は16GBのマイクロSDカード)から8GBのSDカードへまるごとコピーしてみました。 もちろんコピー元のSDカードでコピー先のSDカードの容量を超えて使用しているとコピーはできません。 今回は、コピー元のパーティションサイズを縮小してコピー先へコピーします。
コピーするにはGpartedというフリーのパーティション編集ツールをつかいます。 Gpartedを使い慣れている方なら以下の説明は不要かもしれません。
Raspberry PiにつながるUSBのCD/DVDなどがあればRaspberry Pi上でもできると思いますが、もってないのでパソコン上で行いました。 パソコン上で行うには、SDカードのリード/ライトできるUSBアダプタなど2つ(ソース、ディスティネーション)必要です。
検索してみると他にもRaspberry Piのパーティションをgpartedを用いてサイズ変更している人はそこそこいる。
この人はGPartedのLive CDで直接Micro SDからMicro SDへコピーをしているが、
コンピュータにCDドライブがないので直接コピーができない。
USBメモリも予備がないのでUSBブートも諦め、今回はVirtualBox VMでコピーする。
Raspberry Piのイメージをvdiに変換する
まずはRaspberry PiのイメージをVirtualBoxが読み込める形式にしなければならない。
RAWイメージから仮想ハードディスクイメージを作成する
VBoxManage convertfromraw sdb.img sdb.vdi --format VDI    # VDIフォーマット
VBoxManage convertfromraw sdb.img sdb.vmdk --format VMDK  # VMDKフォーマット
初めて知ったがイメージからvdiへ変換するコマンドがVirtualBoxをインストールする際に自動的に入るようだ。 便利なのでこれを使う。
VBoxManage convertfromraw backup.img RPi.vdi --format VDI
そして移行先もVirtualBox側で読み込めないとマズいことに気づいた。 なので移行先をコンピュータに接続。イメージを作り、vdi形式に変換する。
dd if=/dev/rdisk2 of=~/recover.img bs=1024000

---

VBoxManage convertfromraw recover.img recover.vdi --format VDI
VirtualBoxで動かすOSを取得する
VirtualBox上でGparted LiveCDを動かす手もあるはずだが、 対応しているか不明=起動するのかわからない手段ではなく確実な方法で。
VirtualBox上でDebianを動かし、
Debianにgpartedをインストールして実行するようにした。慣れてるOSなので。
Ubuntuの場合、仮想マシン向けのハードディスクイメージを配布している ので、Debianも仮想HDDイメージがないか探したらOSBoxesが作成、配布しているものを見つけた。

OSBoxesダウンロード画面
画像のところでダウンロードすることができる。
VirtualBoxで仮想マシンを作成
別記事にまとめた。
仮想マシンにRaspberry Piと復元先のMicro SDファイルを追加する

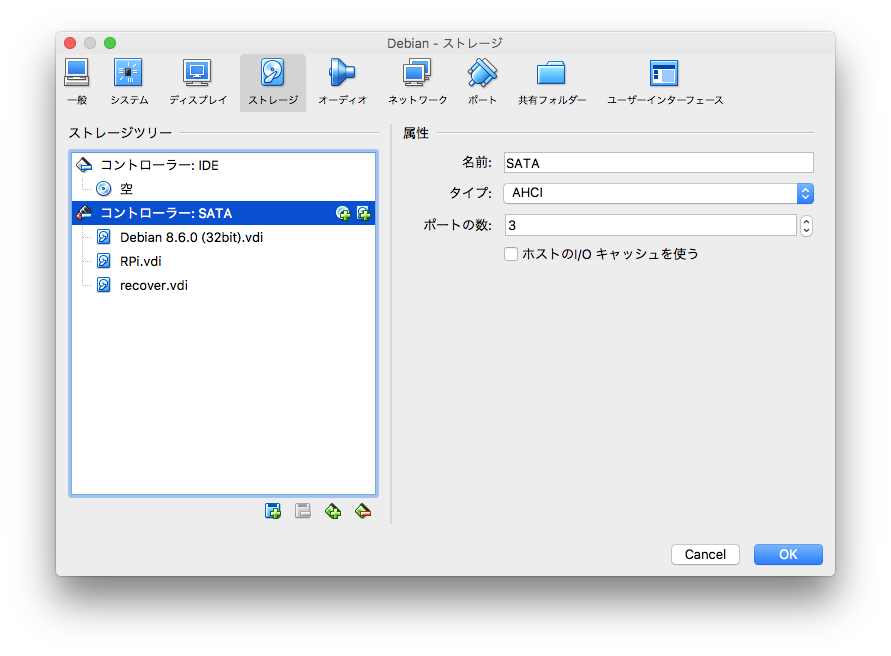
マシンを選択して、左上2番目から設定。

ストレージを追加する
ストレージタブに移動し、SATAコントローラを選択後、サイドバー下部のHDD追加アイコンからハードディスクを追加
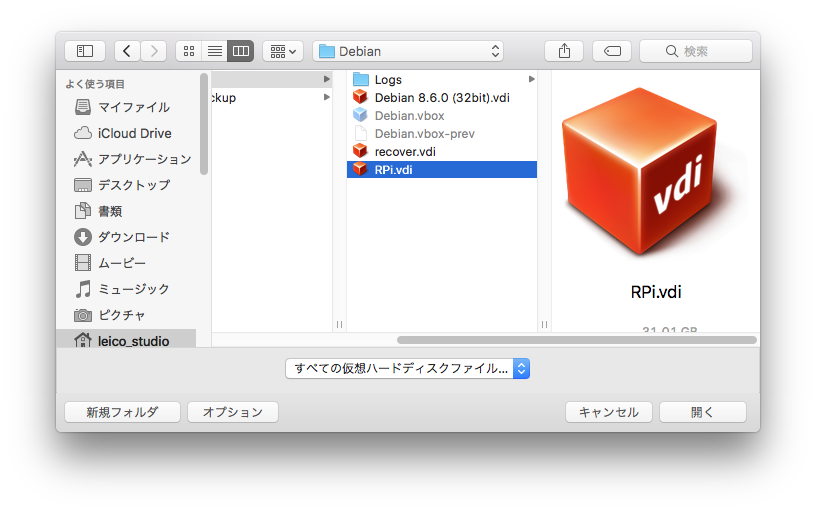
MicroSDファイルを追加
先ほど作ったMicro SDのファイルをRaspberry Pi、復元先両方とも追加する。
この時に仮想マシンのディレクトリに入れておくと混乱しない。
仮想マシンは初期設定では~/VirtualBox VMs/にまとめられている。
終了
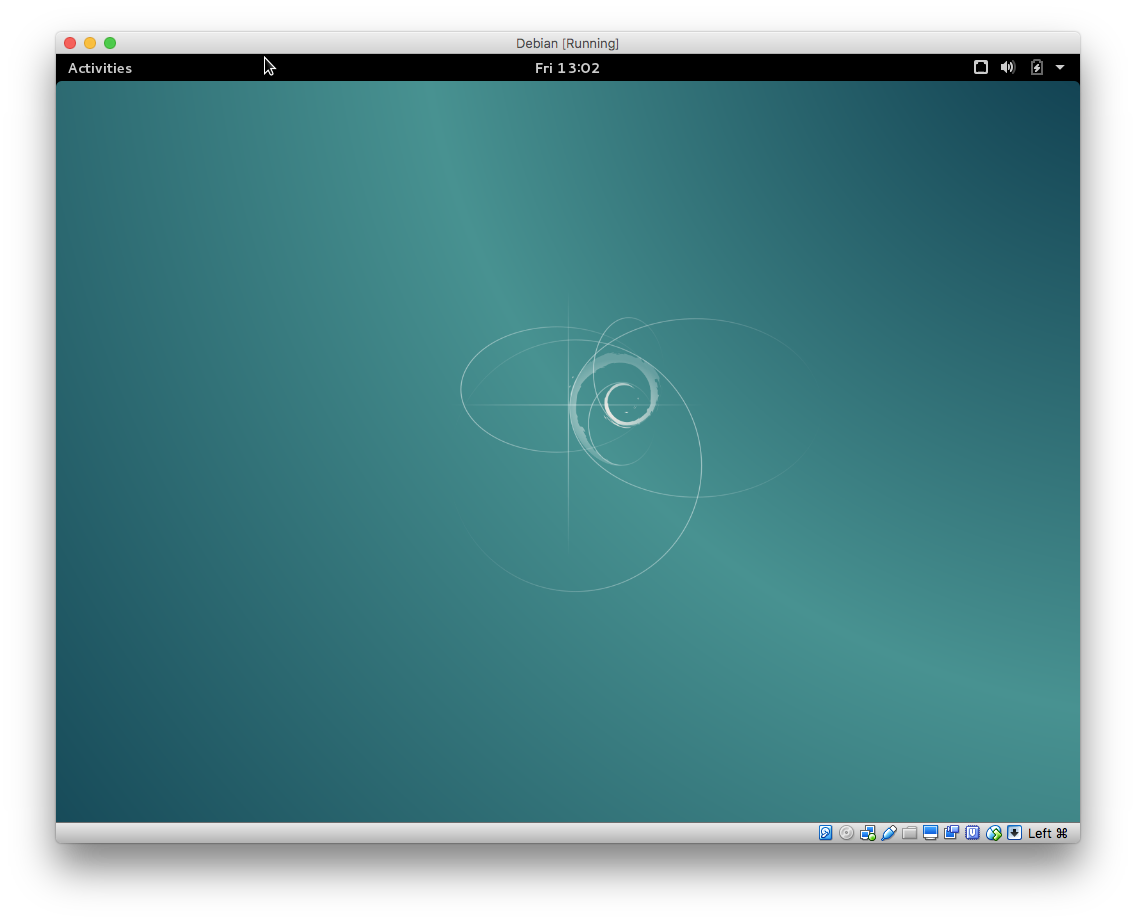
追加されたら終了し、Debianを起動する。
Debianの設定
ログインには
- ID
- osboxes.org
- PASS
- osboxes.org
を使う。
まずは管理者rootになる。
su root
この状態でapt-get installすると
Media change: please insert the disc labeled ...
というエラーが出る。
Open and modify the file /etc/apt/sources.list
vi /etc/apt/sources.listYou will see an output like this:
#

deb cdrom:[Debian GNU/Linux 7.0.0 _Wheezy_ - Official amd64 CD Binary-1 20130504-14:44]/ wheezy main

deb http://ftp.us.debian.org/debian/ wheezy main
deb-src http://ftp.us.debian.org/debian/ wheezy main

deb http://security.debian.org/ wheezy/updates main
deb-src http://security.debian.org/ wheezy/updates main

# wheezy-updates, previously known as 'volatile'
deb http://ftp.us.debian.org/debian/ wheezy-updates main
deb-src http://ftp.us.debian.org/debian/ wheezy-updates main
~
This file contains all your package sources. You might find a deb cdrom:[Debian GNU/Linux 7.0.0 Wheezy - Official amd64 CD Binary-1 20130504-14:44]/ wheezy main line indicating a local CDROM as a package source. Comment it out by placing a # symbol at the beginning of the line and save the file.
You should leave it like this:
#

# deb cdrom:[Debian GNU/Linux 7.0.0 _Wheezy_ - Official amd64 CD Binary-1 20130504-14:44]/ wheezy main

deb http://ftp.us.debian.org/debian/ wheezy main
deb-src http://ftp.us.debian.org/debian/ wheezy main

deb http://security.debian.org/ wheezy/updates main
deb-src http://security.debian.org/ wheezy/updates main

# wheezy-updates, previously known as 'volatile'
deb http://ftp.us.debian.org/debian/ wheezy-updates main
deb-src http://ftp.us.debian.org/debian/ wheezy-updates main
~
sources.listをみると、他にもなんか少ない。
Example sources.list
Below is an example of a
sources.listfor Debian 8/Jessie.deb http://httpredir.debian.org/debian jessie main deb-src http://httpredir.debian.org/debian jessie main deb http://httpredir.debian.org/debian jessie-updates main deb-src http://httpredir.debian.org/debian jessie-updates main deb http://security.debian.org/ jessie/updates main deb-src http://security.debian.org/ jessie/updates mainIf you also want the contrib and non-free components, add contrib non-free after main:
deb http://httpredir.debian.org/debian jessie main contrib non-free
deb-src http://httpredir.debian.org/debian jessie main contrib non-free

deb http://httpredir.debian.org/debian jessie-updates main contrib non-free
deb-src http://httpredir.debian.org/debian jessie-updates main contrib non-free

deb http://security.debian.org/ jessie/updates main contrib non-free
deb-src http://security.debian.org/ jessie/updates main contrib non-free
最終的にこのようにした。Example contrib non-free と同じ。
# vi /etc/apt/sources.list

deb http://httpredir.debian.org/debian jessie main contrib non-free
deb-src http://httpredir.debian.org/debian jessie main contrib non-free

deb http://httpredir.debian.org/debian jessie-updates main contrib non-free
deb-src http://httpredir.debian.org/debian jessie-updates main contrib non-free

deb http://security.debian.org/ jessie/updates main contrib non-free
deb-src http://security.debian.org/ jessie/updates main contrib non-free
aptのカタログリストをアップデートし、Debianを最新の状態にする。
# apt-get update
# apt-get upgrade
やっと、gpartedをインストールする。
# apt-get install gparted
gpartedを使ってパーティションサイズ変更とコピー
Debianデスクトップ左上Activitiesからgpartedを起動する。
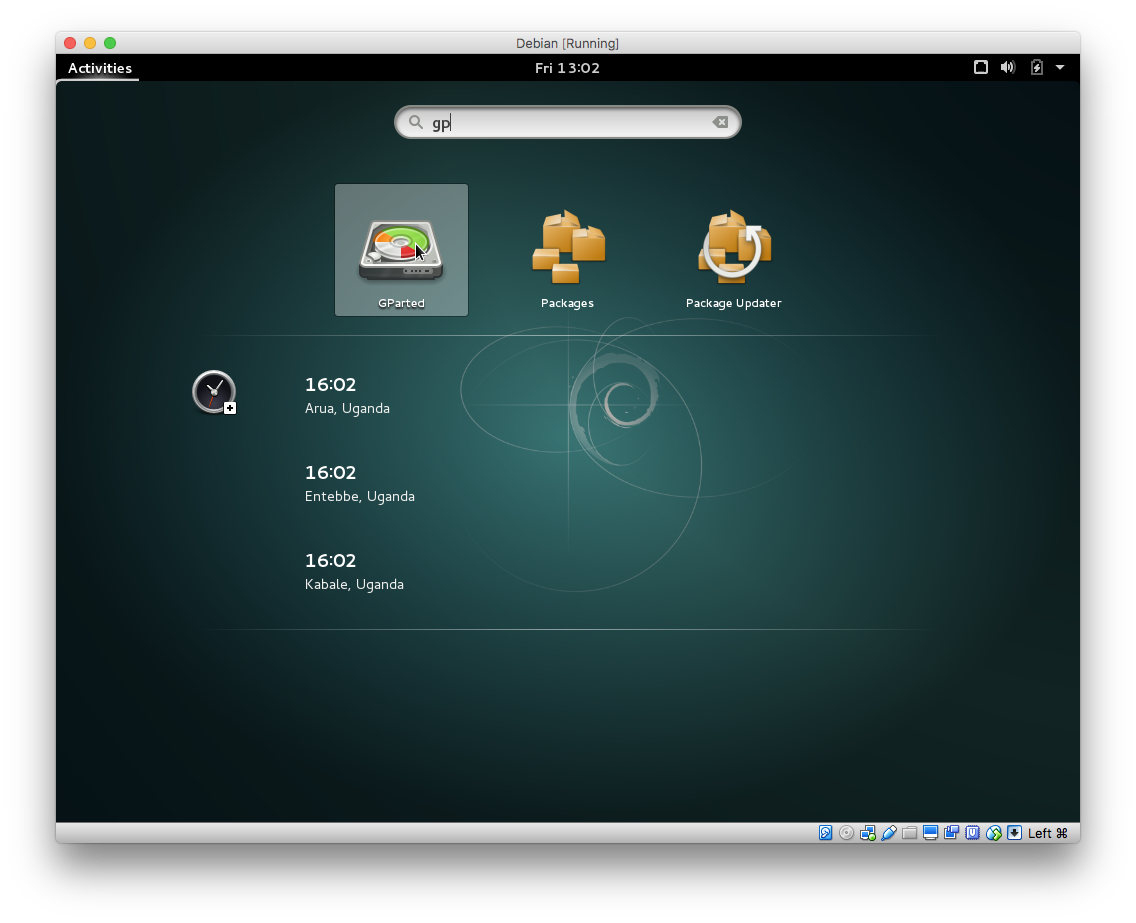
gpartedで検索し、起動する。
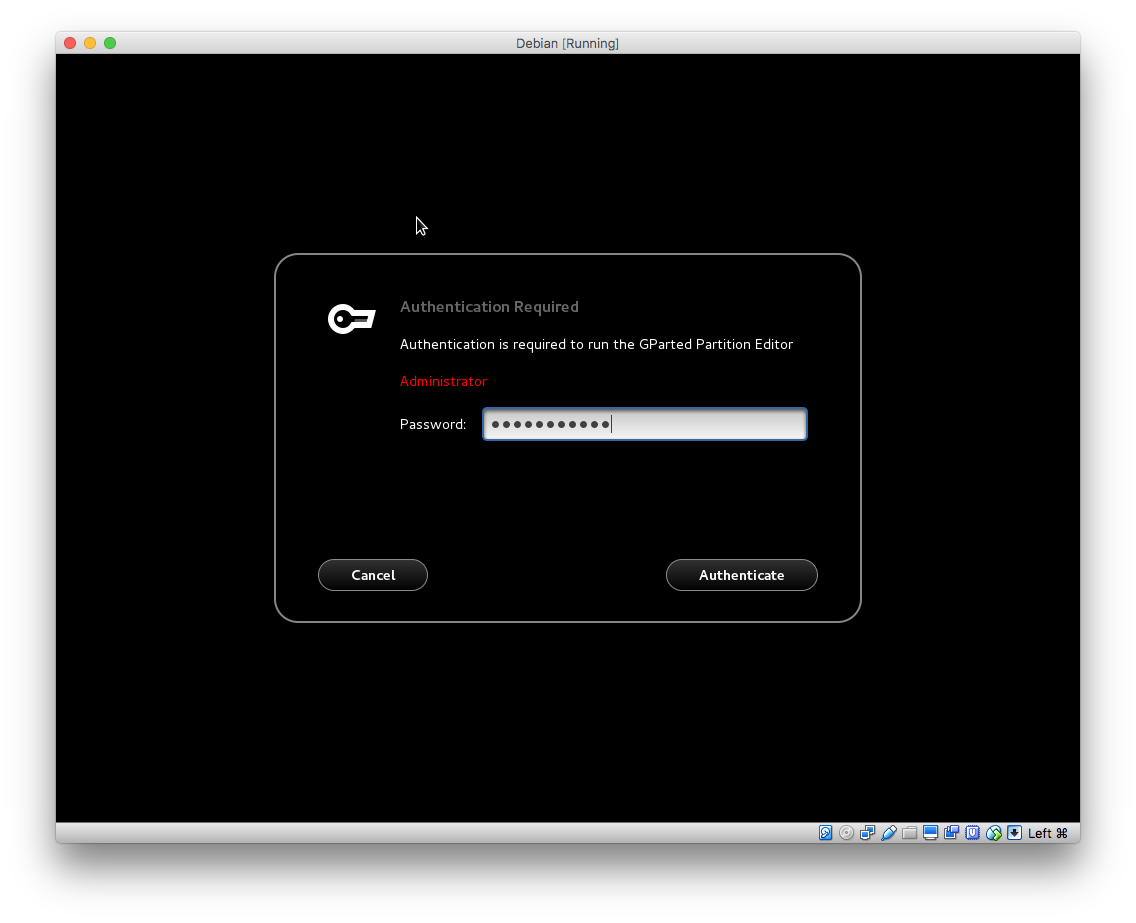
パーティション操作を行うので、管理者権限での実行を求められる。
管理者パスワードを入れて認証する。
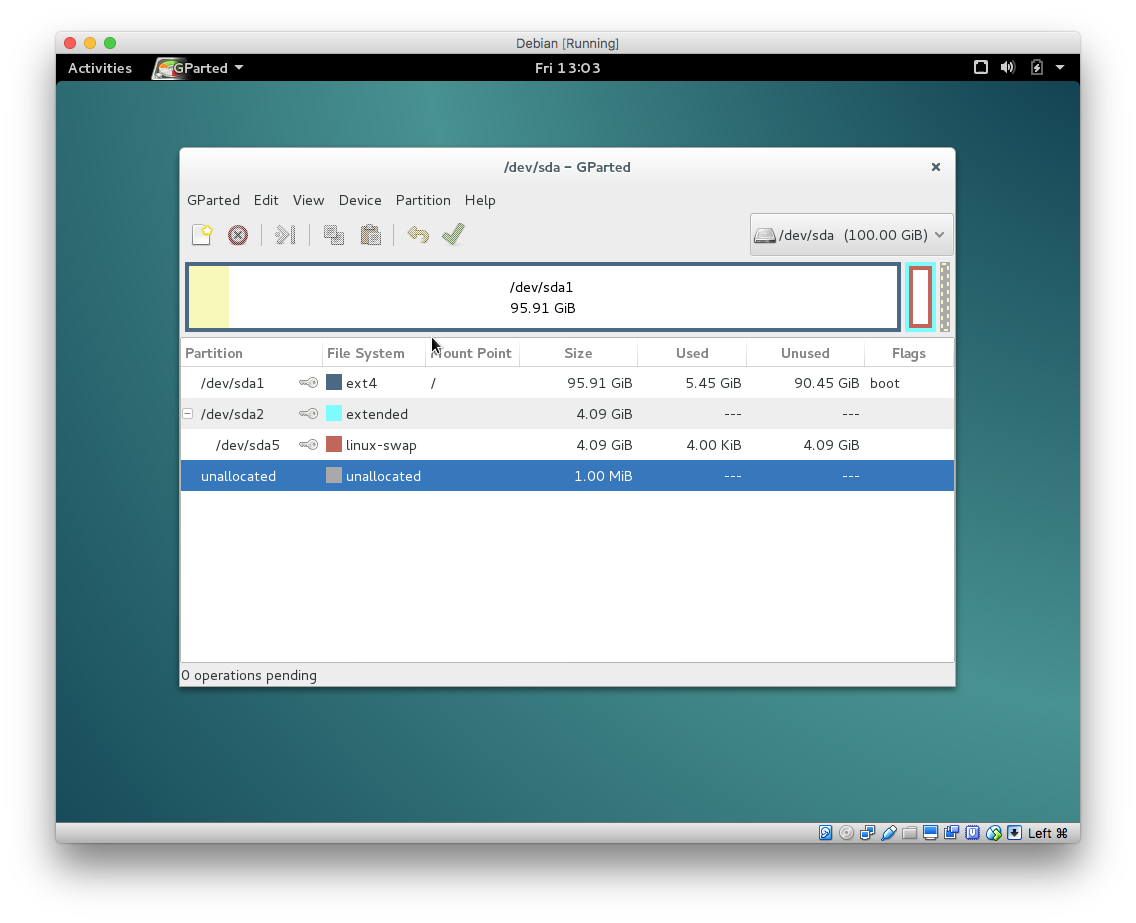
gpartedが起動する。
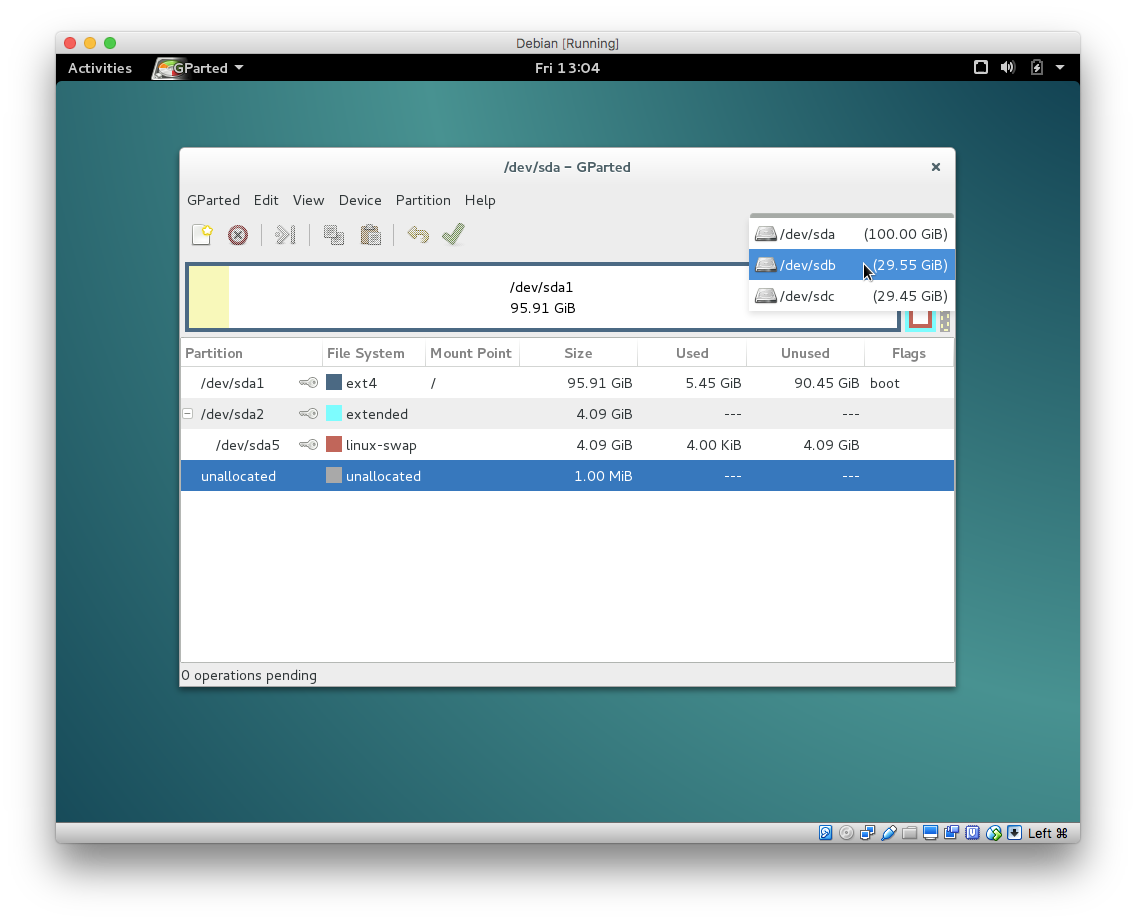
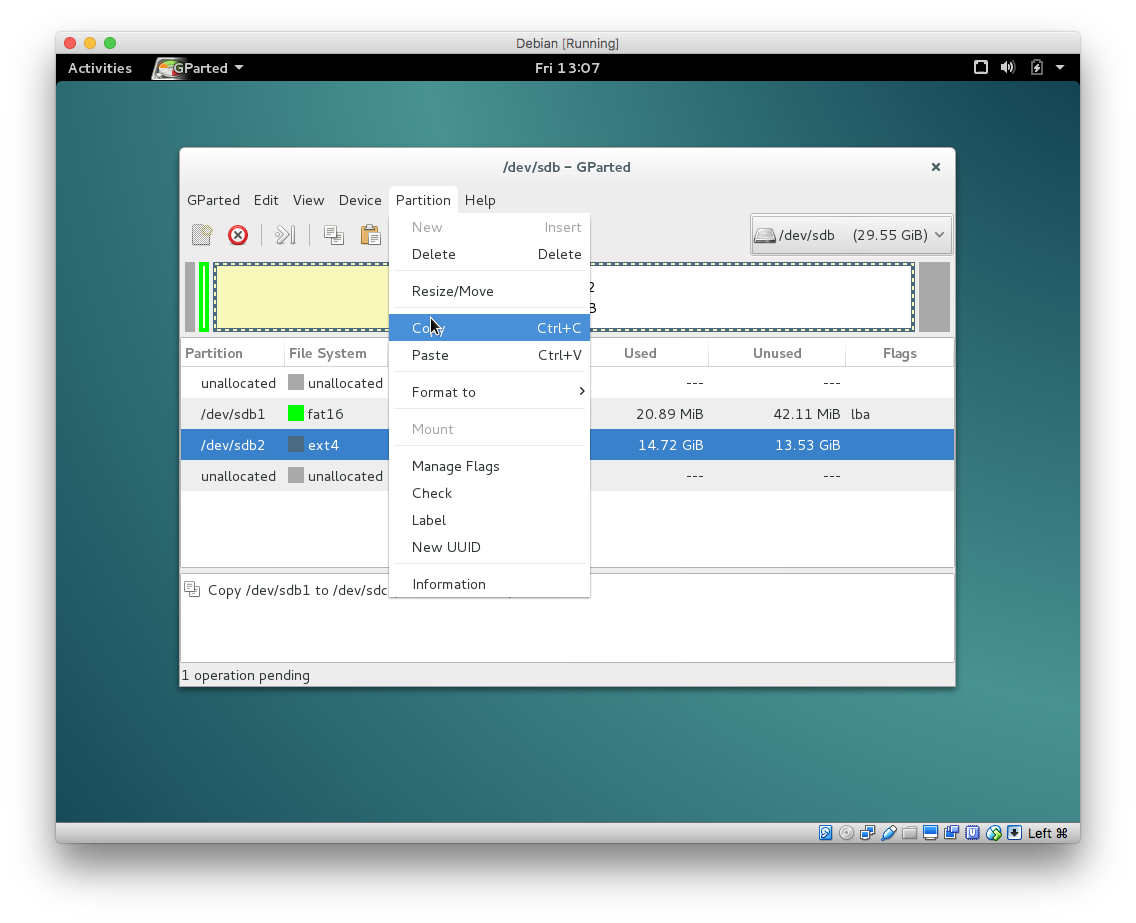
まずは元々Raspberry Piが入っているディスクを選択する。
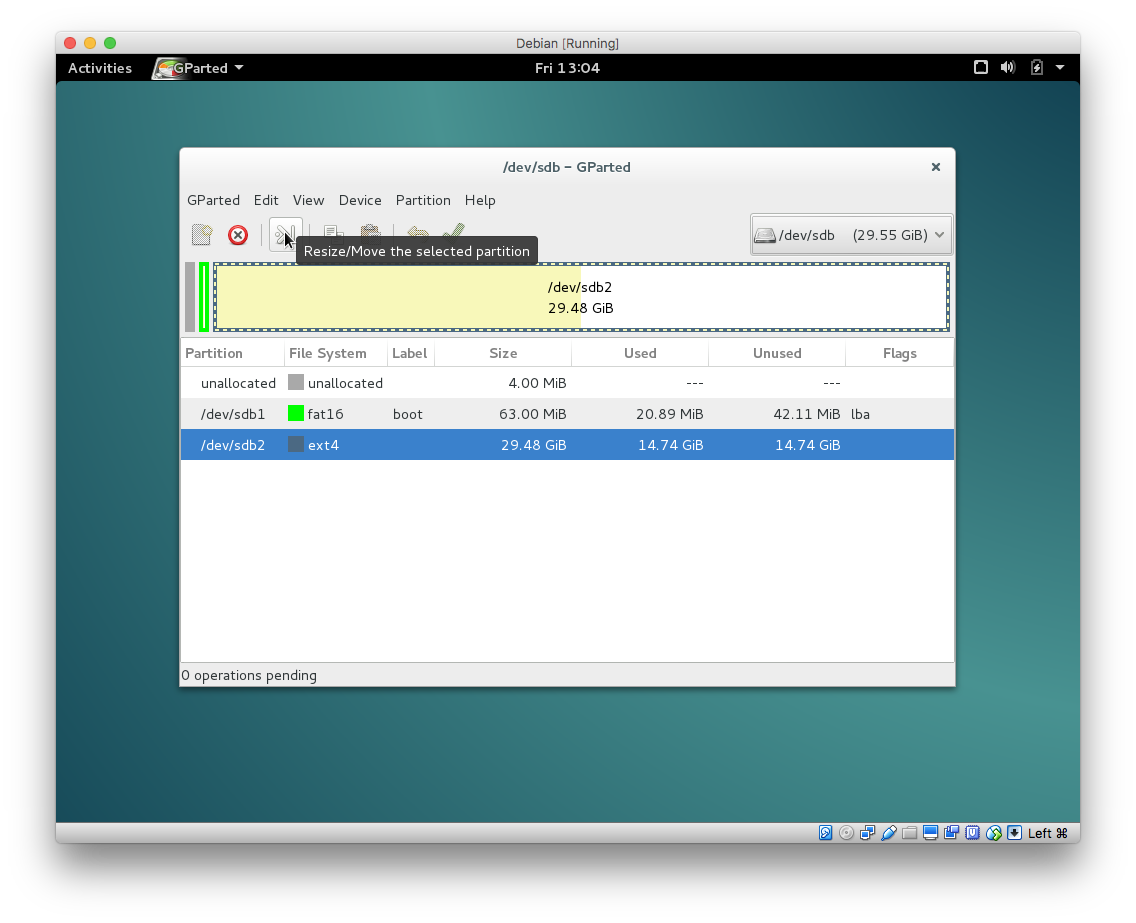
復元先に移動できるサイズにするために、 Raspberry Pi本体のデータが入っているパーティションのサイズを変更する。
Resize/Move the selected partitionを選択
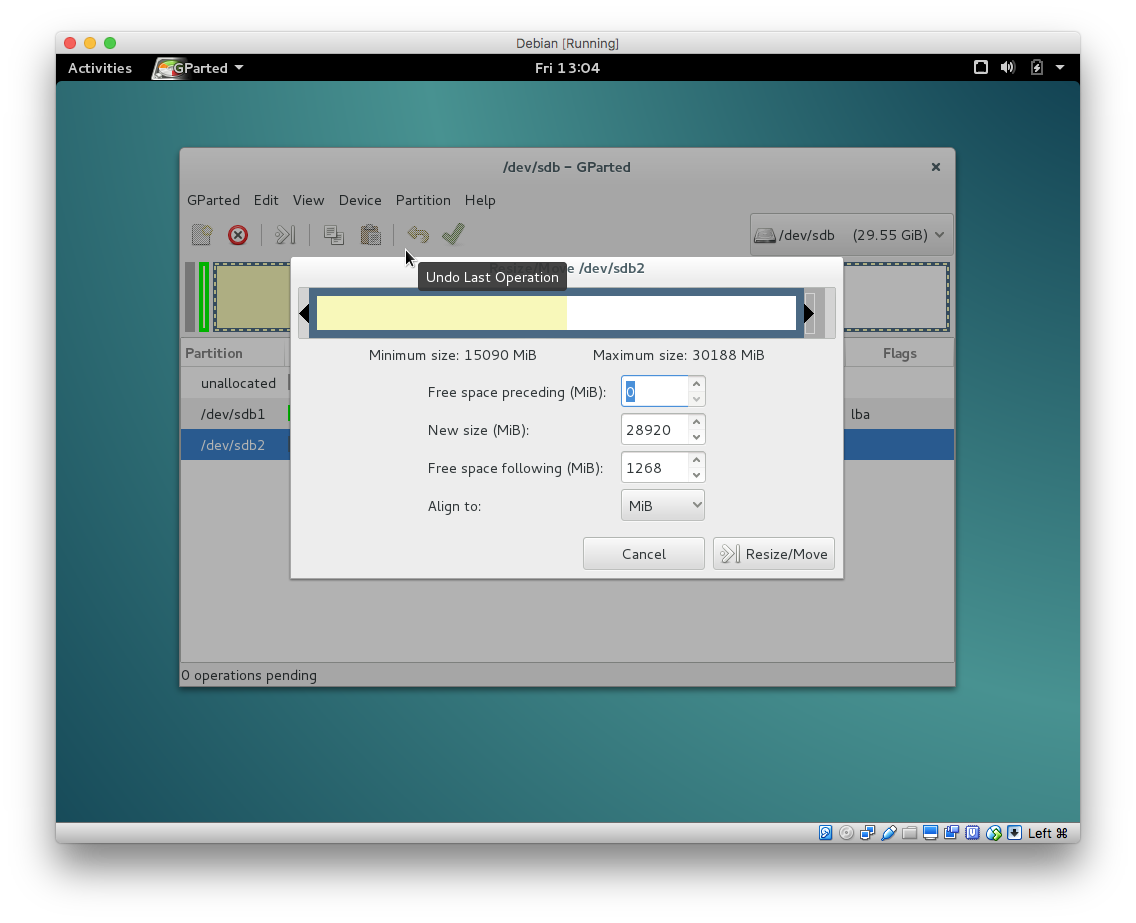
パーティション右端をドラッグして復元先に収まりそうなサイズに縮小する。
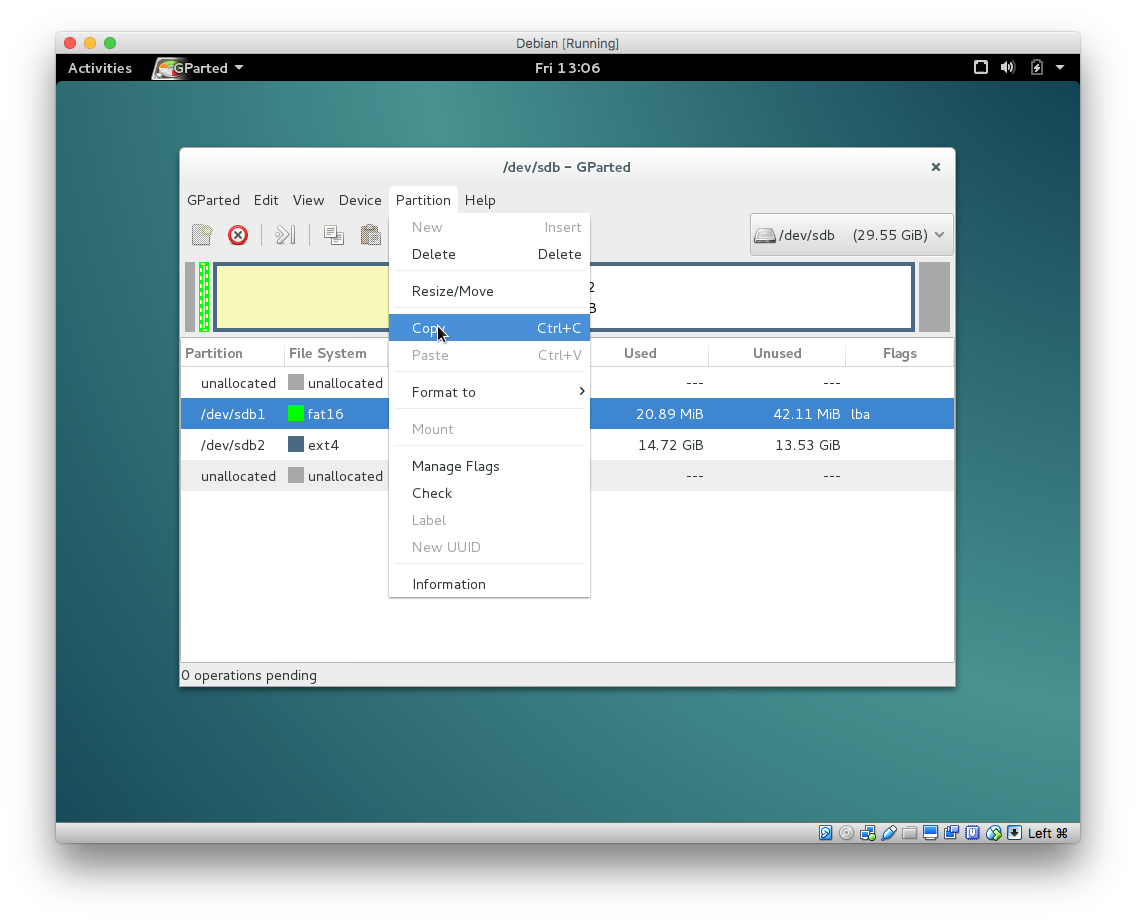
変更が完了したら各々のパーティションを復元先にコピーする。
まずはbootをコピーし
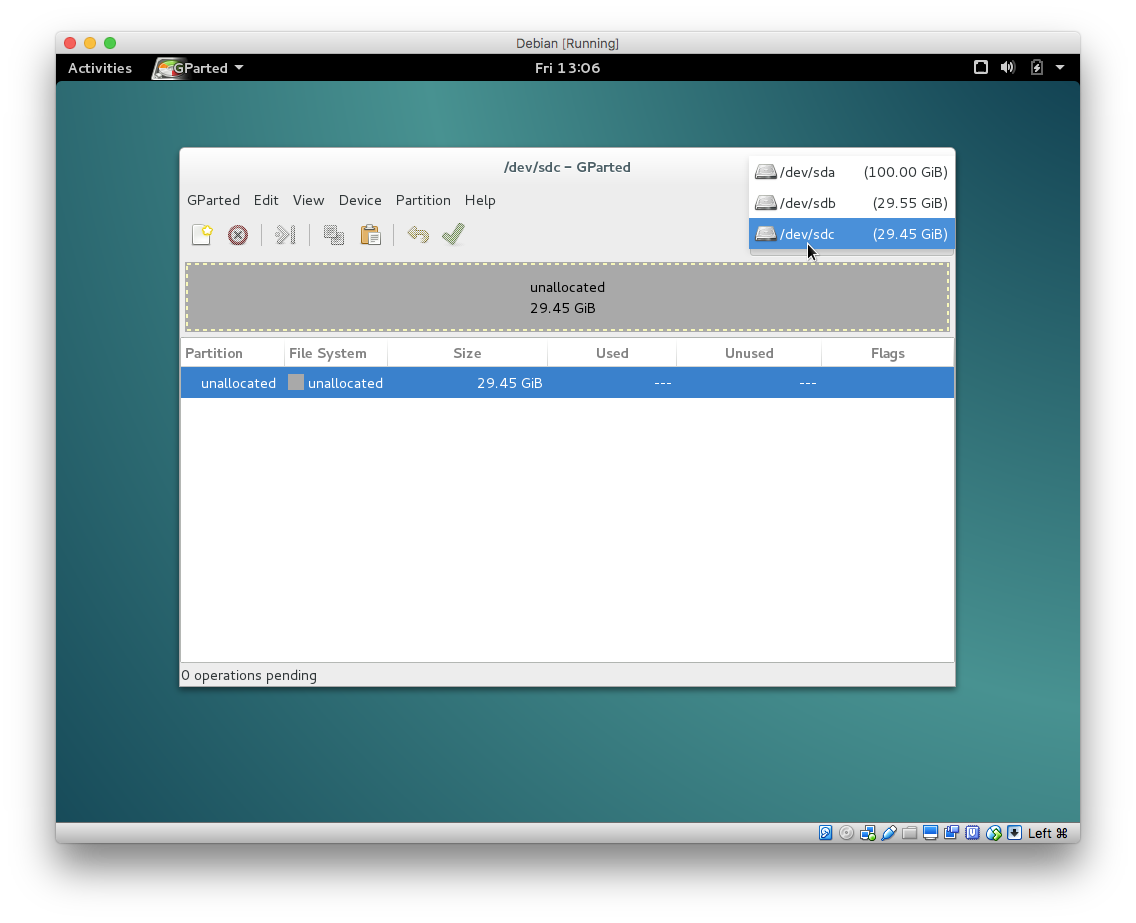
復元先を選択し

パーティションを貼り付ける。
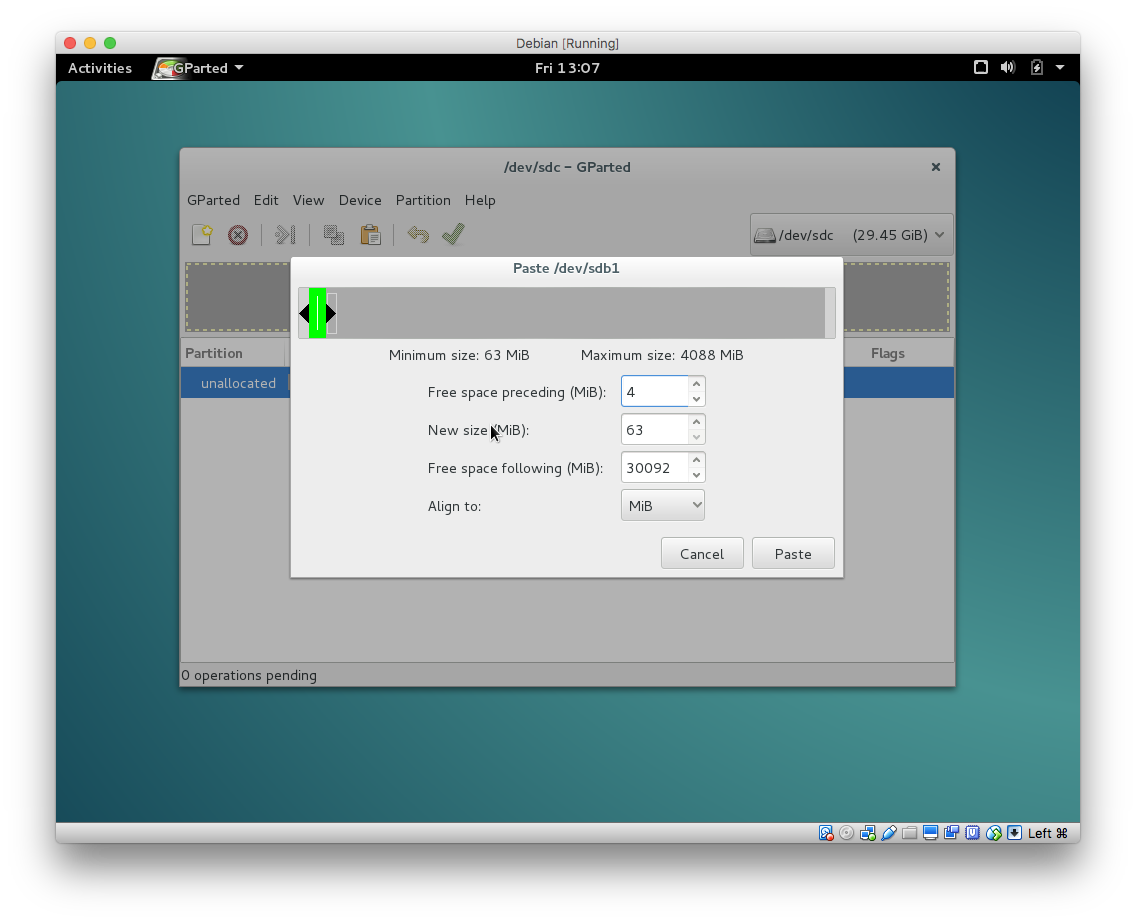
貼り付けるとサイズ変更と同じ画面が表示される。
なぜかRaspberry Piのパーティションの先頭4MiB分が使われていないので、
Free space preceding (MiB):の部分を 4 に変更する。
PasteしてRaspberry Pi本体のデータもコピーする。
Raspberry Pi本体のパーティションをコピーして

bootの後ろに貼り付ける。
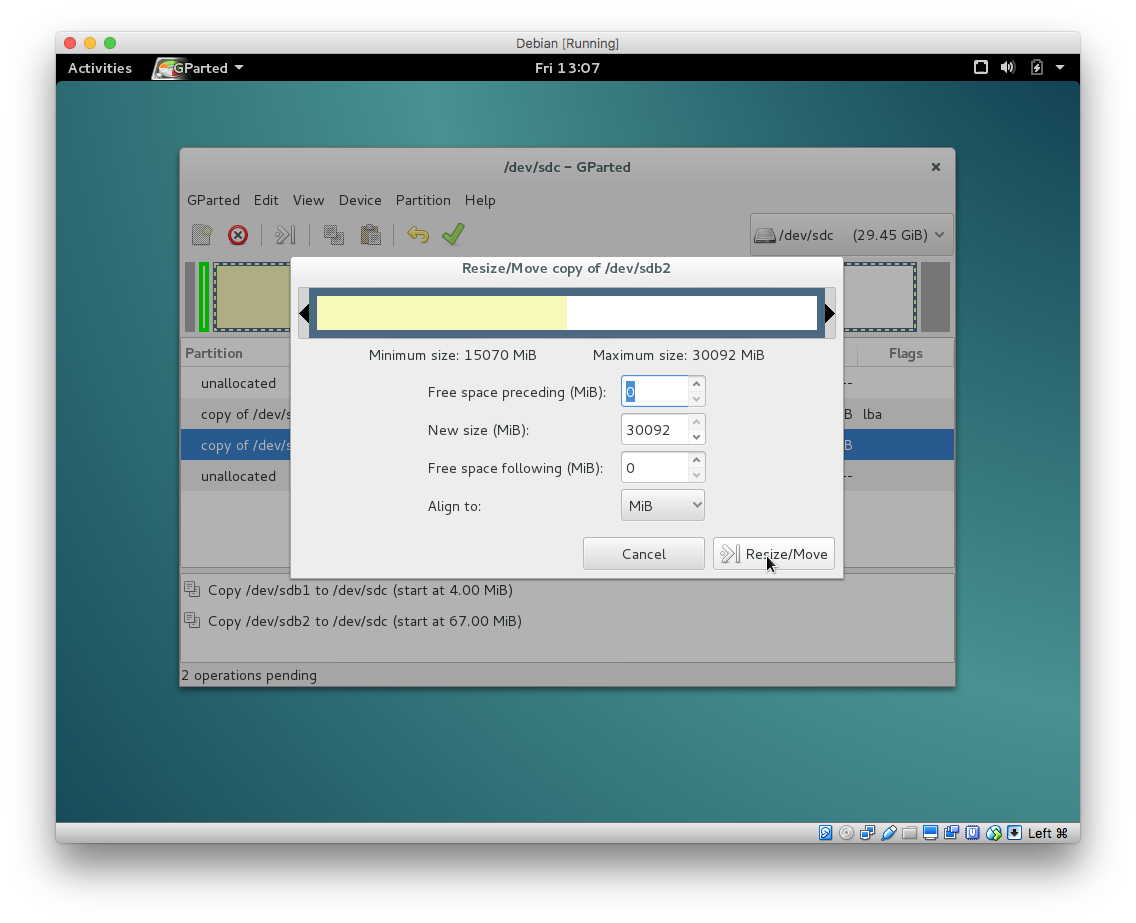
貼り付け終了後、パーティション後部に空白がある場合、パーティションをリサイズして埋める。
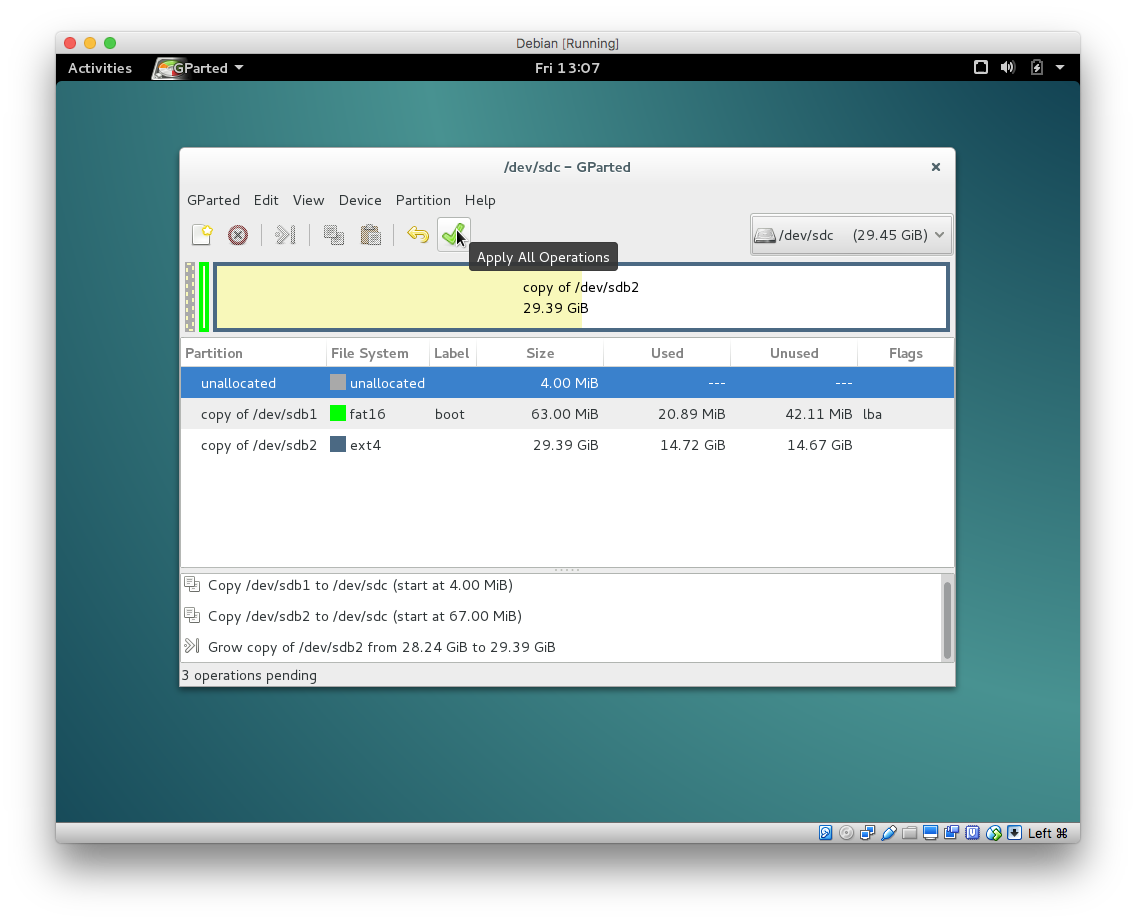
全ての変更を適用
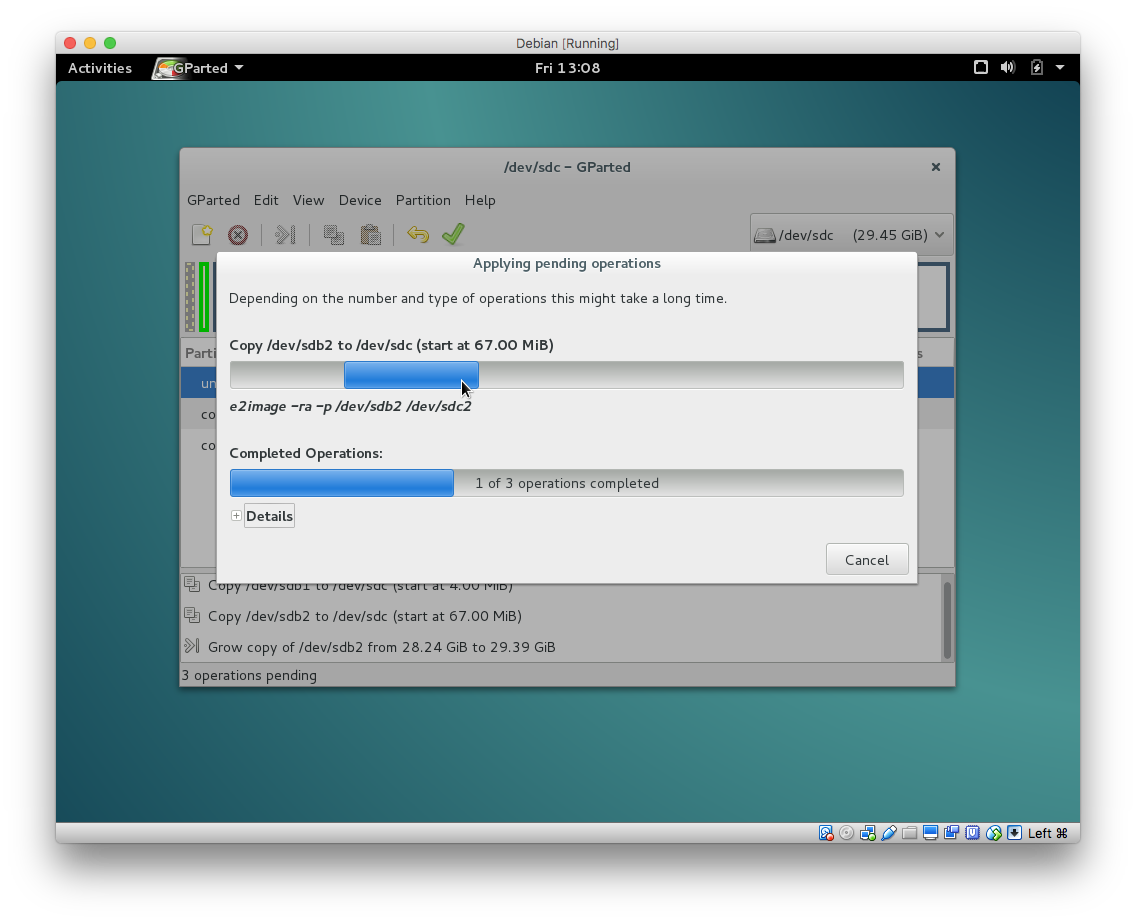
パーティションのコピーが行われて、復元先にRaspberry Piがコピーされる。
復元先Micro SDをvdiからディスクイメージファイルに変換する
- 仮想ハードディスクイメージをRAWイメージに変換する
VBoxManage clonehd sdb.vdi sdb.img --format RAW
こうした。
VBoxManage clonehd ~/VritualBox\ VMs/recover.vdi ~/recover.img --format RAW
復元先Micro SDへディスクイメージをコピーする
復元先のMicro SDをカードリーダにセットし、
dd if=recover.img of=/dev/rdisk2 bs=1024000
を実行する。 Raspberry Piに刺し、Raspberry Piが起動できれば復元終了