Arduino を AVR ライタにする
- created
- 2018-08-23
- last change
- 2018-08-27 22:06:16 +0000
自作キーボードが文鎮化したからAVR ライタ側から復活を試みる
その一環のログ
参考:
- Arduino - Software
- Arduinoのブートローダの修復方法 | Physical Computing FAQ& Tutorial
- Arduino IDE から、生の AVR にスケッチを書き込む方法(ArduinoIDE 1.6.4以降版。ArduinoをAVR ISPライターとして使う) - nomolkのブログ
Arduino IDE をインストール
ここからダウンロードしてインストールする。 途中寄付を求められるのでお金ある人は寄付をしてダウンロードする。 お金がない人は Just Download する。 お金ある人は Just Download 押さない。
Arduino を ISP 化する
Arduino を起動した後、以下のように辿ると ISP 化するためのソースコードが開く
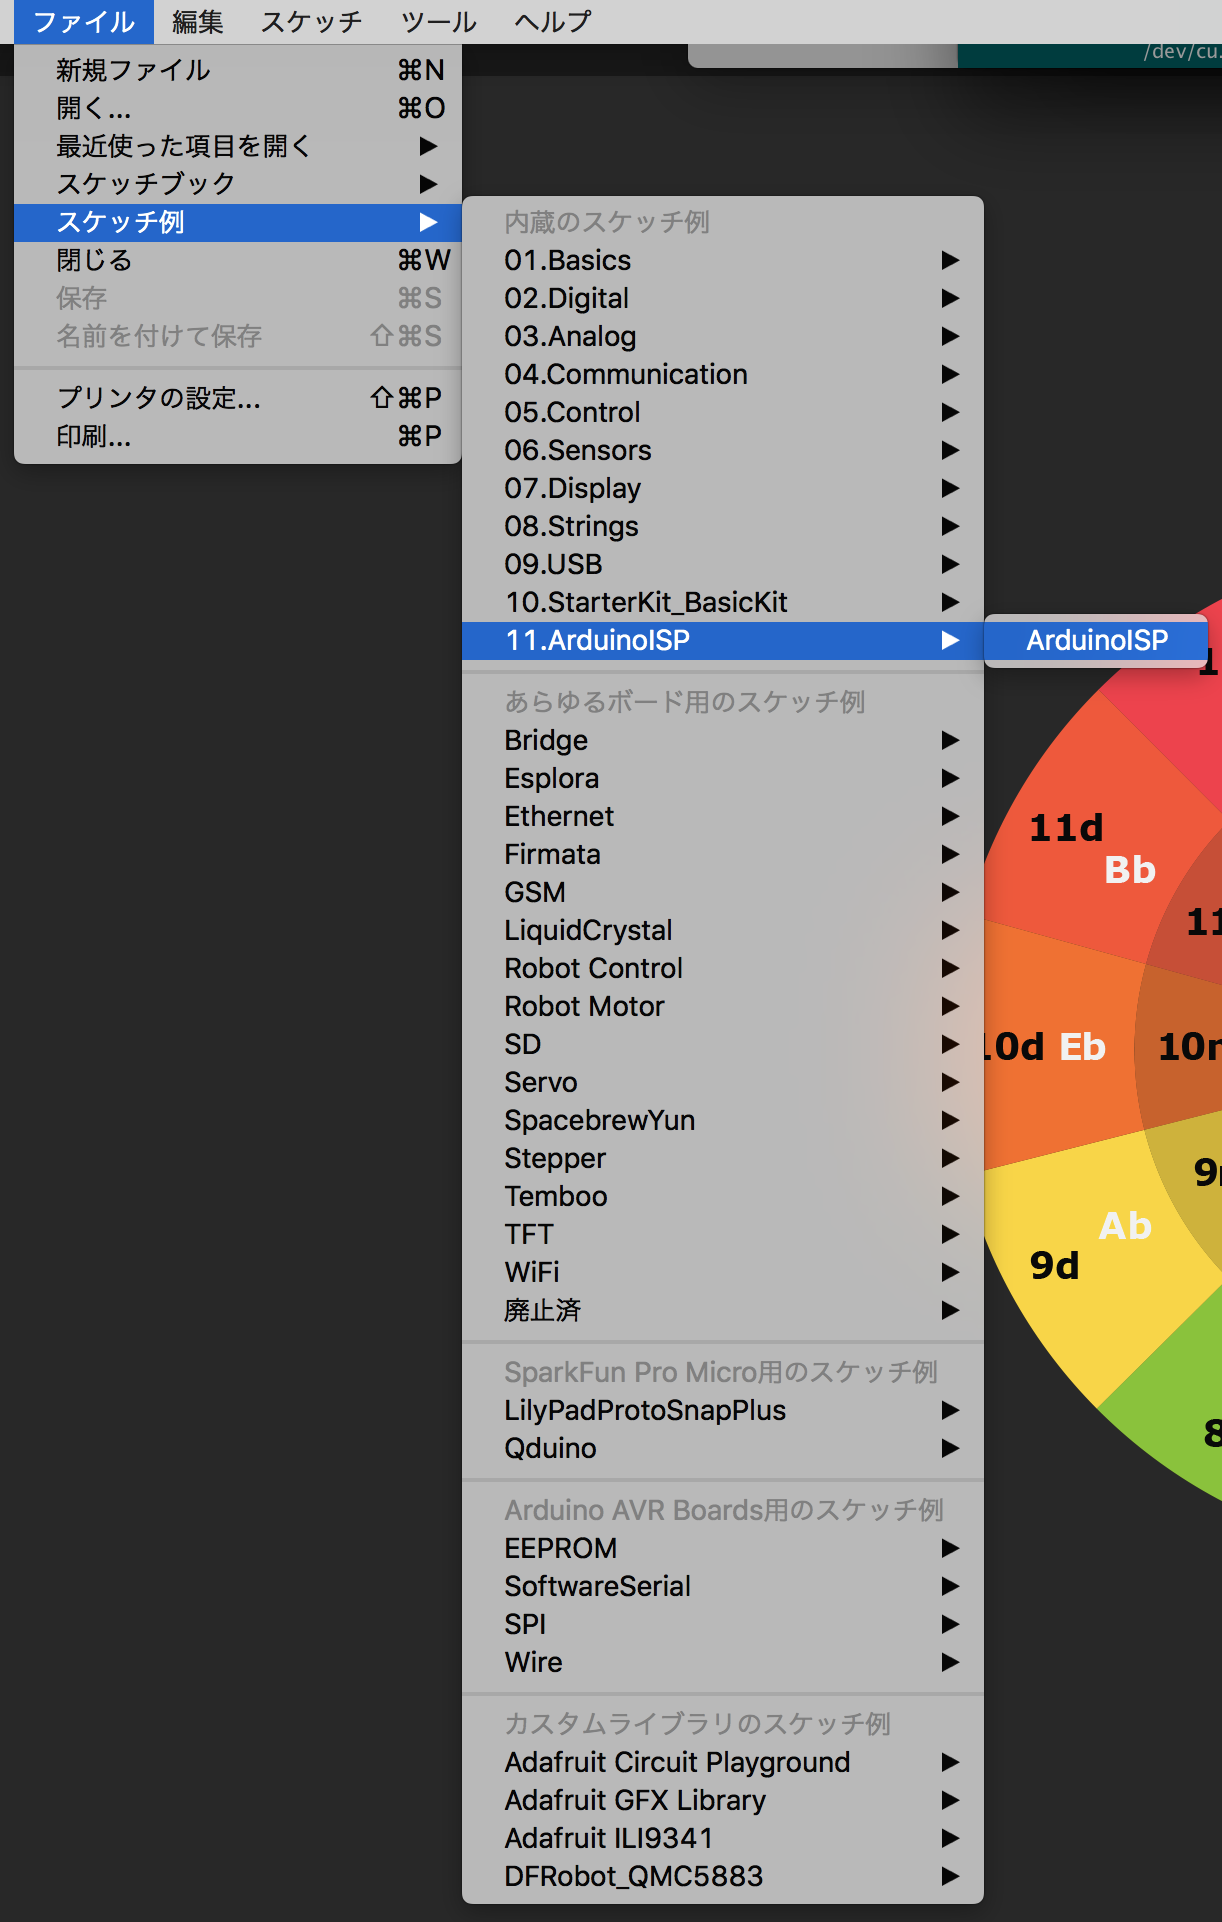
ファイル -> スケッチ例 -> ArduinoISP -> ArduinoISP
以下ボードの設定
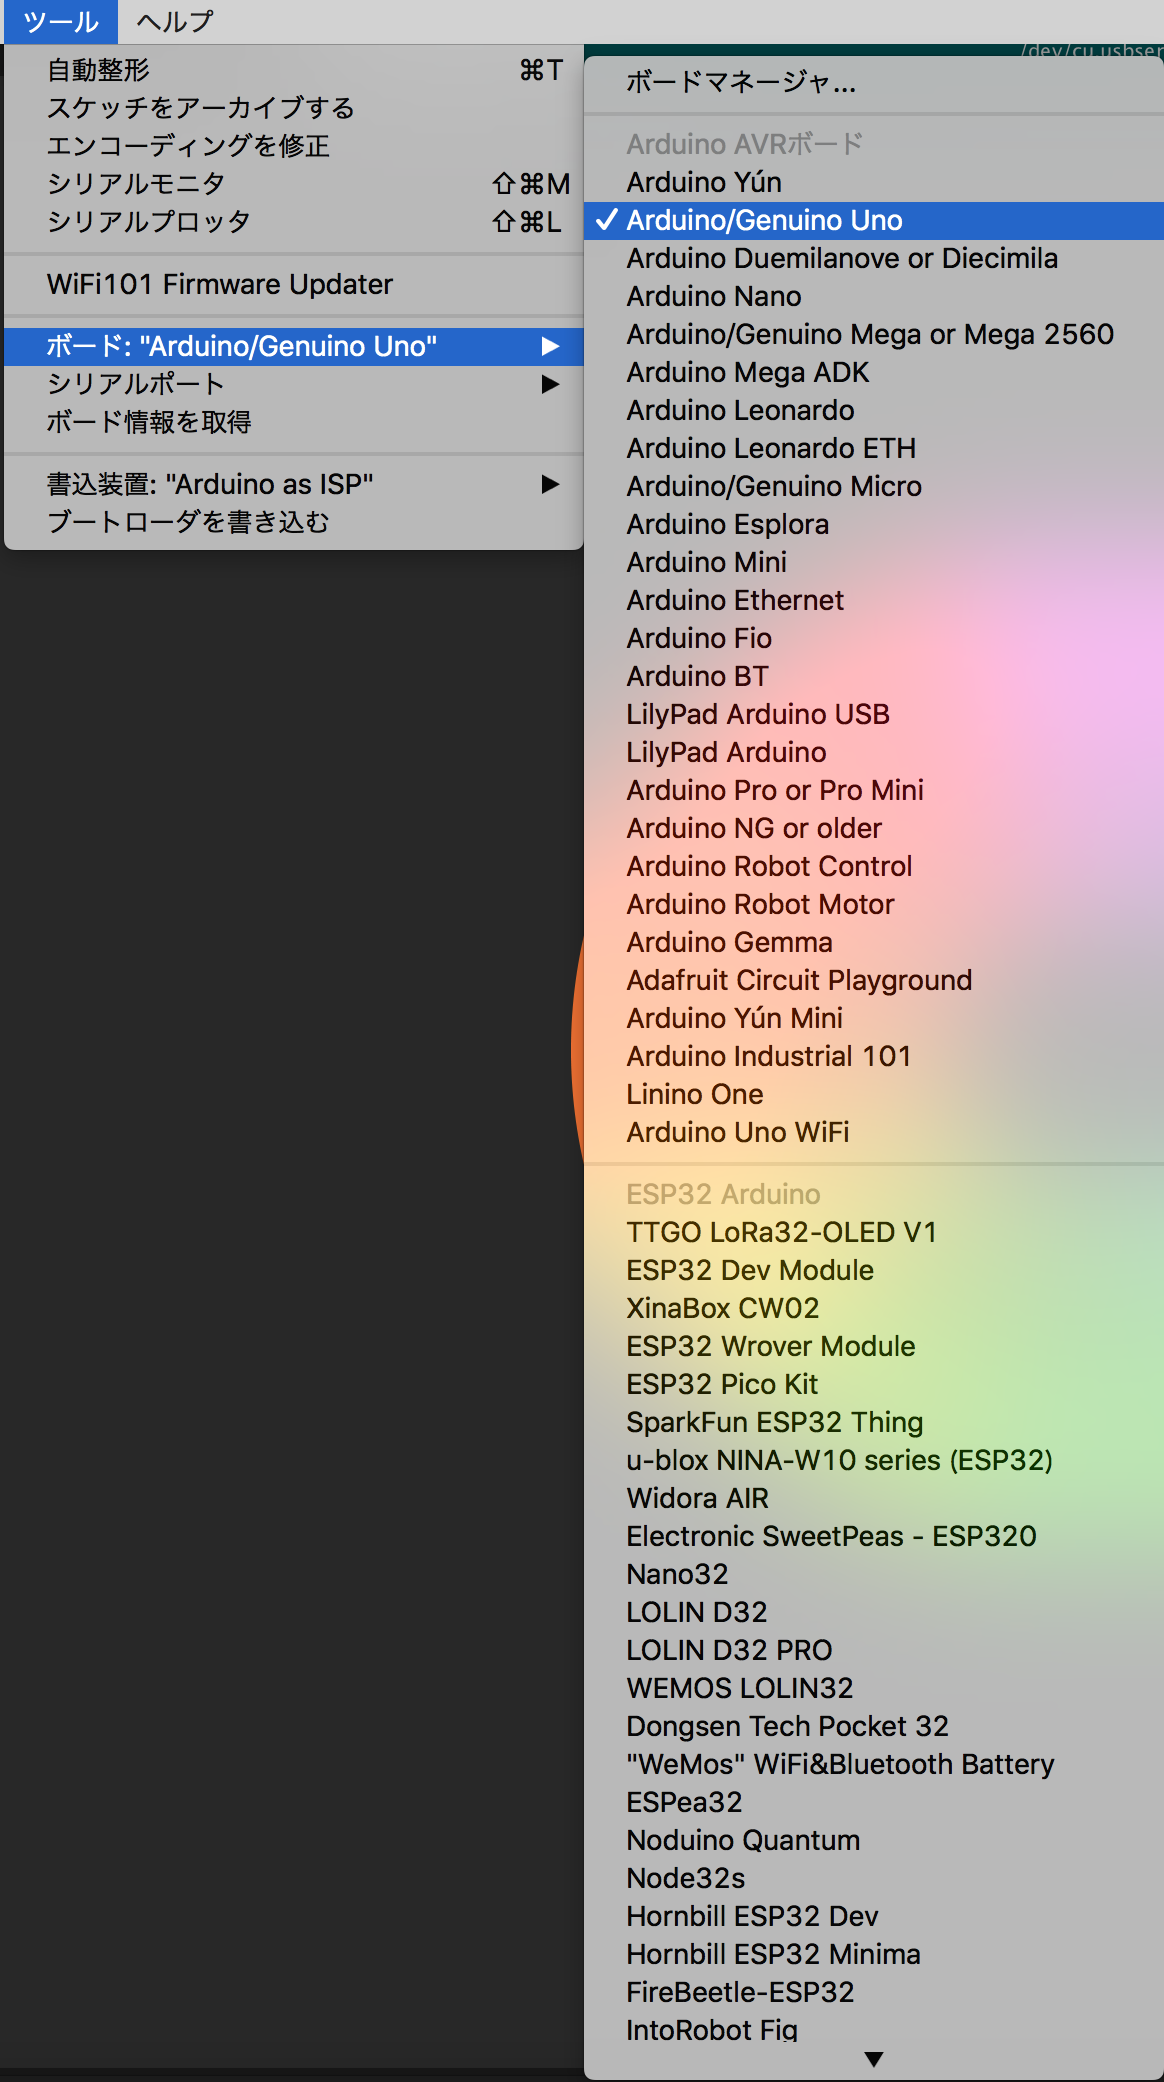
ボードは Arduino Uno を選択
書込装置の設定は特に必要ない。
Arduino ISPのスケッチアップロード時は書き込み装置の選択は関係無いので 「書き込み装置は AVRISP mkII」は不要ですよ。
IF you have a programmer, you use one of those options. If you’re simply uploading via a USB cable, you don’t need to worry about it. However, if you’ve purchased an external programmer, such as the AVR-ISP, an stk500, or even if you’re uploading via an ArduinoISP, you’ll be selecting one of those options and instead of hitting Upload, you’d hit Upload Using Programmer (look under the File menu).
外部プログラマーを利用しない限り書込装置の部分は気にしなくていいらしい。まりすさんコメント感謝。
シリアルポートはボードによって異なる。 一度 Arduino IDE を Arduino Uno と接続せずに起動しシリアルポートを確認、 Arduino Uno を接続して Arduino IDE を立ち上げ直して増えた項目が Arduino Uno のシリアルポートになる。
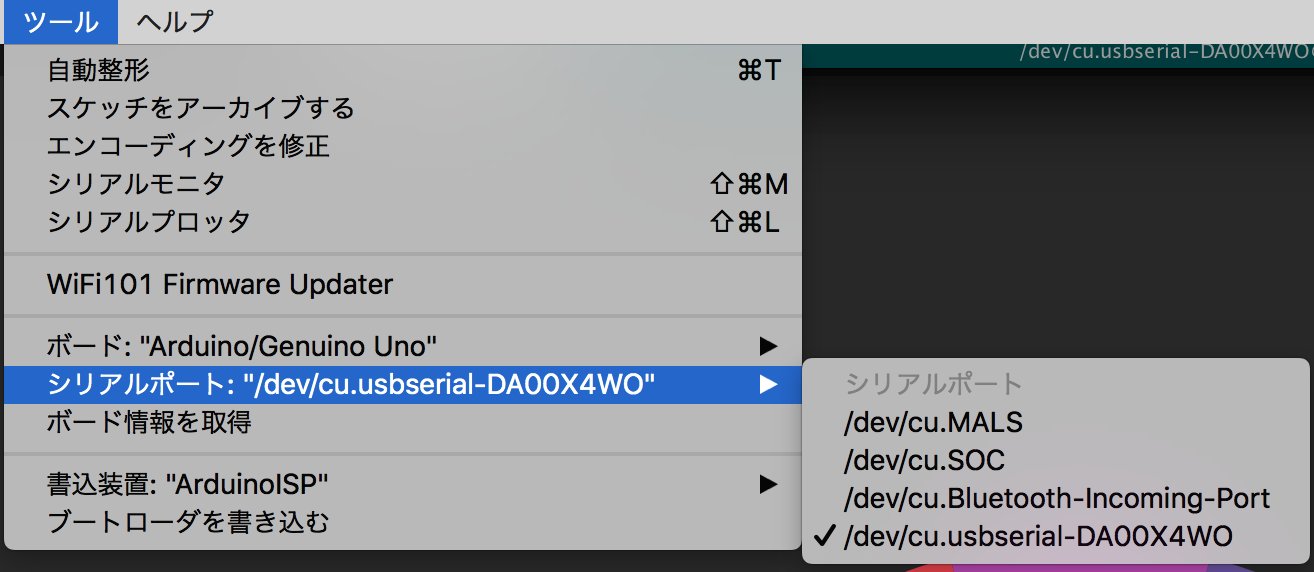
今回は /dev/cu.usbserial-DA00X4WO
後は書き込むだけで ISP 化する。
書き込み後にISPとして利用する方法
書込装置の設定
また、「ツール」→「書込装置」とたどり、 候補の中から ”Arduino as ISP” を選択します。 これは、Arduinoを書き込み機として使っているということを指定しています。
選択肢の中には、”ArduinoISP” のような紛らわしいものがあります。 間違えずに ”as” の付いているものを選択して下さい。
書き込む際は書き込み装置をこのようにする
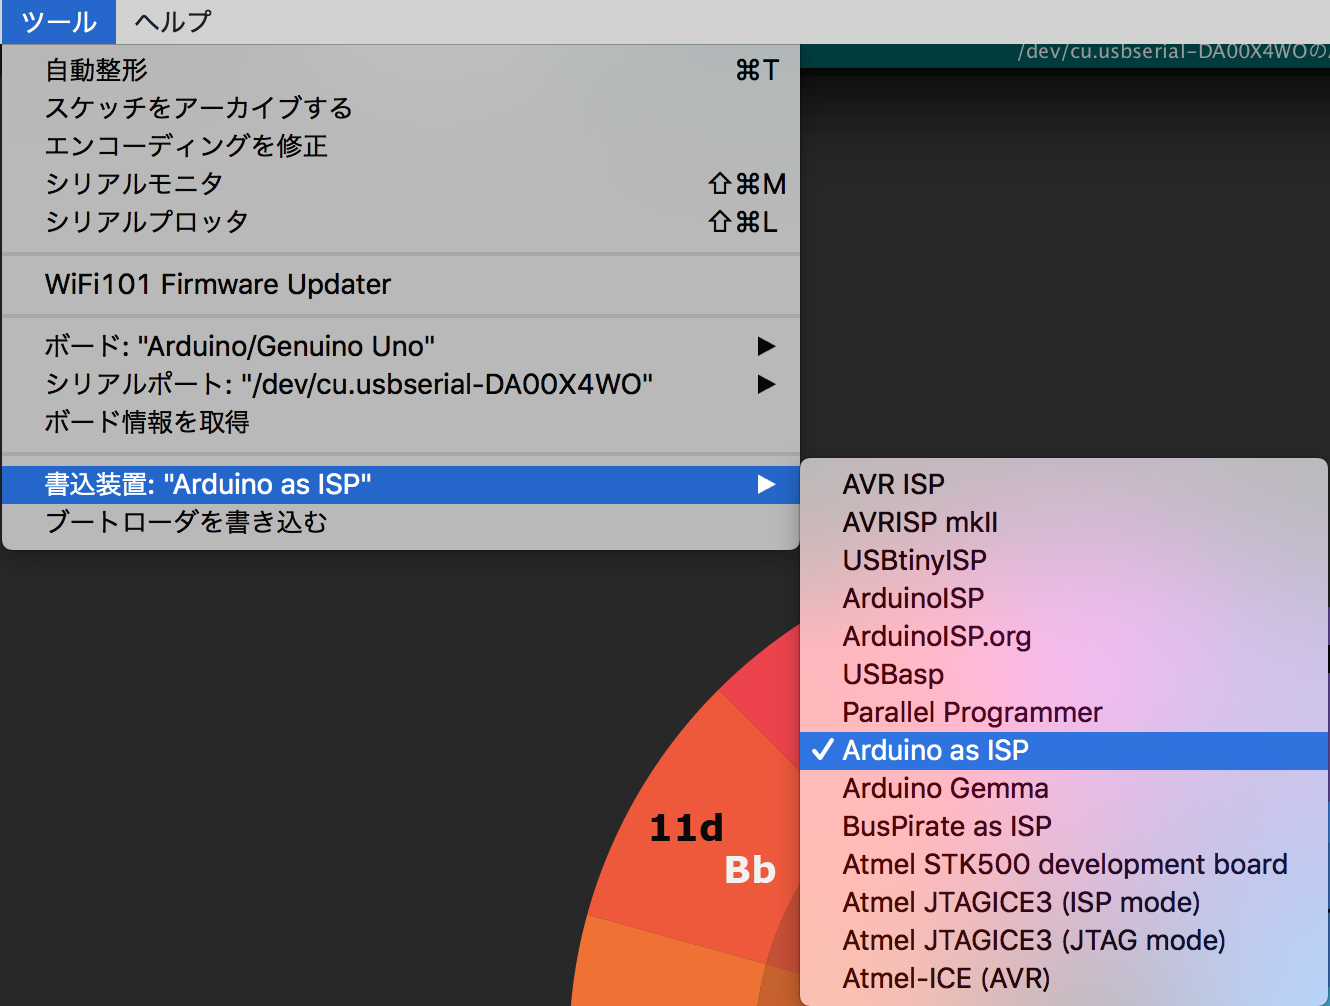
ツール -> 書込装置 -> Arduino as ISP を選択
結線方法
Pin 10 is used to reset the target microcontroller.
By default, the hardware SPI pins MISO, MOSI and SCK are used to communicate with the target. On all Arduinos, these pins can be found on the ICSP/SPI header:
          MISO °. . 5V (!) Avoid this pin on Due, Zero...
          SCK   . . MOSI
                . . GND
On some Arduinos (Uno,…), pins MOSI, MISO and SCK are the same pins as digital pin 11, 12 and 13, respectively. That is why many tutorials instruct you to hook up the target to these pins. If you find this wiring more practical, have a define USE_OLD_STYLE_WIRING. This will work even when not using an Uno. (On an Uno this is not needed).
Arduinoのピン AVRのピン名 例)ATmega88/168P/328Pなど 例)ATtiny2313 D10 RESET 1 1 D11 MOSI 17 17 D12 MISO 18 18 D13 SCK 19 19 5V VCC,AVCC 7,20 20 GND GND 8,22 10
このように結線をする。以下はArduino Uno のAVRポートに接続する例。
