ESP32でI2C接続: I2C Scanner
- created
- 2018-05-29
- last change
- 2018-05-29 17:05:22 +0000
一歩ずつしっかりと
ESP32にI2Cデバイスを接続する。 一気にいくつも実験するとエラーを起こしている場所の検証が 複数のポイントに渡るので、一歩ずつ進めてゆく。
参考
結線
今回は地磁気センサーとしては安いモジュールをつないでみる。 結線は基板のプリントやESP32の仕様書を確認しつつ、 いくつか先人のサイトを参考にこのようになった。
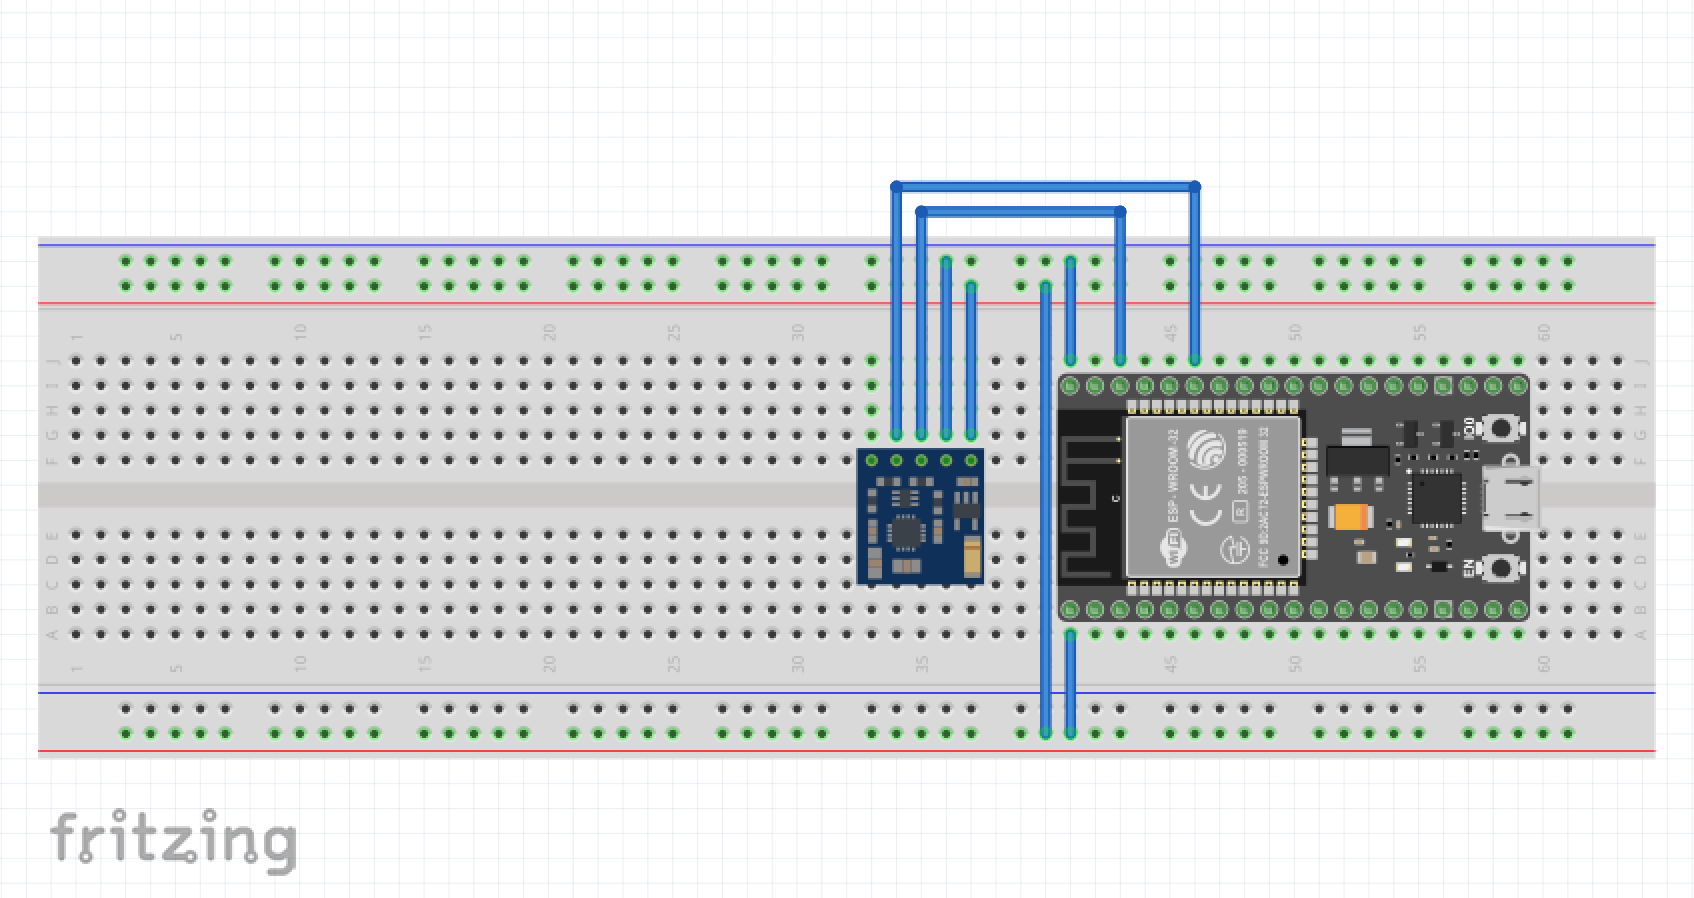
ESP32SとHMC5883Lの配線
| HMC5883L | ESP32 |
|---|---|
| VCC | 3.3V |
| GND | GND |
| SCL | GPIO22(I2C SCL) |
| SDA | GPIO21(I2C SDA) |

ESP32-dev-boardのピン配線
I2C HMC5883L Arduino GND GND GND VCC VCC 5V SCL SCL A5 SDA SDA A4
実際に配線が合っているかを確認する。
I2CScannerをESP32用に改造して実行する
配線したら、まずはI2Cのモジュールのアドレスを確認します。 Arduino.ccに、i2cscannerというツールのソースコードがあります。 これを使うと、見つかったi2cのモジュールのアドレスが分かります。 http://playground.arduino.cc/Main/I2cScanner
ここに挙がっている I2CScanner を実行し、デバイスが存在するか確認する。
ただし、Arduino用なのでESP32用に Serial.begin(9600); から Serial.begin(115200); に書き換える。
 // --------------------------------------
// i2c_scanner
//
// Version 1
//    This program (or code that looks like it)
//    can be found in many places.
//    For example on the Arduino.cc forum.
//    The original author is not know.
// Version 2, Juni 2012, Using Arduino 1.0.1
//     Adapted to be as simple as possible by Arduino.cc user Krodal
// Version 3, Feb 26  2013
//    V3 by louarnold
// Version 4, March 3, 2013, Using Arduino 1.0.3
//    by Arduino.cc user Krodal.
//    Changes by louarnold removed.
//    Scanning addresses changed from 0...127 to 1...119,
//    according to the i2c scanner by Nick Gammon
//    http://www.gammon.com.au/forum/?id=10896
// Version 5, March 28, 2013
//    As version 4, but address scans now to 127.
//    A sensor seems to use address 120.
// Version 6, November 27, 2015.
//    Added waiting for the Leonardo serial communication.
//
// branch out for ESP32 2018/05/25
//
//
// This sketch tests the standard 7-bit addresses
// Devices with higher bit address might not be seen properly.
//

#include <Wire.h>


void setup()
{
  Wire.begin();

  Serial.begin(115200);        //ここを書き換えた
  while (!Serial);             // Leonardo: wait for serial monitor
  Serial.println("\nI2C Scanner");
}


void loop()
{
  byte error, address;
  int nDevices;

  Serial.println("Scanning...");

  nDevices = 0;
  for(address = 1; address < 127; address++ )
  {
    // The i2c_scanner uses the return value of
    // the Write.endTransmisstion to see if
    // a device did acknowledge to the address.
    Wire.beginTransmission(address);
    error = Wire.endTransmission();

    if (error == 0)
    {
      Serial.print("I2C device found at address 0x");
      if (address<16)
        Serial.print("0");
      Serial.print(address,HEX);
      Serial.println("  !");

      nDevices++;
    }
    else if (error==4)
    {
      Serial.print("Unknown error at address 0x");
      if (address<16)
        Serial.print("0");
      Serial.println(address,HEX);
    }
  }
  if (nDevices == 0)
    Serial.println("No I2C devices found\n");
  else
    Serial.println("done\n");

  delay(5000);           // wait 5 seconds for next scan
}
実行結果
Scanning...
I2C device found at address 0x0D  !
done
I2Cデバイスが見つかればアドレスが表示される。 今回の場合、 0x0d というアドレスが確認できた。
HMC5887Lのアドレスは 0x1E のはずなんだけれども・・・。