Linux: avconvをlibx264、libx265、alsaを利用できるようにしてビルドする
- created
- 2017-10-21
- last change
- 2020-05-01 00:23:58 +0000
bmdtools以外にも色々使えるようにしておきたい
Setup
bmdtoolsneeds a recent version of libav installed. In order to build it make sure to have the development headers installed.
Building from source
The common scenario assumes you want to use
x264to encode the video andfdk-aacto encode the audio. You might usex265andopusas well but they are not supported in many container formats.The following instructions assume you want to install everything in
/usr/local.
bmdtoolsのインストールlibavが必要になる。その時に
さらに、
を利用することができる。これに加え、
- alsa audio
を有効にして汎用オーディオ入出力への対応させる。
参考:
- 猫科研究所 - 今更MinGW 2009.06(5) nasm,yasm
- NASM - The Netwide Assembler
- Preface
- make installしたソフトウェアをアンインストールする
- Linux: ライブラリの動的リンクでエラーが出た場合の対処方法
- CompilationGuide/Quick/libx264 – FFmpeg
- alsa - FFmpeg doesn’t recognize my audio sources - Unix & Linux Stack Exchange
- audio - FFMPEG: Unknown input format: ‘alsa’ - Raspberry Pi Stack Exchange
- trailing options found on command line ffmpeg - Stack Overflow
コンパイラ/ビルド用のソフトウェアの準備
ビルドするために以下のコンパイラを入れる。
libx265のビルドには更に以下のものも必要
ccmake
g++ はGNUの標準的なコンパイラとして、NASM/YASMに関しては以下。
nasmとyasmはどちらもx86の SIMD命令(MMX,SSE,SSE2等)に対応したアセンブラ で、 殆どのケースでこれらの命令を利用した高速化のために使用される。 一昔前にはnasmがこの用途での一人勝ち状態であったが、一時期更新が滞り、 新規命令に対応しなかったことから、リプレースとしてyasmが登場した。その後nasmの更新は再開したが、 yasmに移行してしまったプロジェクトも多いため、用途は同じソフトウェアではあるが、両方インストールしておくのが間違いない。
1.1 What Is NASM?
The Netwide Assembler, NASM, is an 80x86 and x86-64 assembler designed for portability and modularity. It supports a range of object file formats, including Linux and *BSD a.out, ELF, COFF, Mach-O, 16-bit and 32-bit OBJ (OMF) format, Win32 and Win64. It will also output plain binary files, Intel hex and Motorola S-Record formats. Its syntax is designed to be simple and easy to understand, similar to the syntax in the Intel Software Developer Manual with minimal complexity. It supports all currently known x86 architectural extensions, and has strong support for macros.
Yasm is a BSD-licensed assembler that is designed from the ground up to allow for multiple assembler syntaxes to be supported (e.g. NASM, GNU AS, etc.) in addition to multiple output object formats and multiple instruction sets. Its modular architecture allows additional object formats, debug formats, and syntaxes to be added relatively easily.
libx264は処理を高速化するためにnasmを利用しており、 libx265は処理を高速化するためにyasmを利用している。
ccmakeをインストールしていないとlibx265のmake-Makefiles.bashが途中で中断される。
同様にg++をインストールしていないとccmakeの途中で中断される。
$ ./make-Makefiles.bash
-- cmake version 3.5.1
-- The C compiler identification is GNU 5.4.0
-- The CXX compiler identification is unknown
-- Check for working C compiler: /usr/bin/cc
-- Check for working C compiler: /usr/bin/cc -- works
-- Detecting C compiler ABI info
-- Detecting C compiler ABI info - done
-- Detecting C compile features
-- Detecting C compile features - done
CMake Error at CMakeLists.txt:19 (project):
  No CMAKE_CXX_COMPILER could be found.

  Tell CMake where to find the compiler by setting either the environment
  variable "CXX" or the CMake cache entry CMAKE_CXX_COMPILER to the full path
  to the compiler, or to the compiler name if it is in the PATH.


-- Configuring incomplete, errors occurred!
See also "/home/test/Downloads/x265-2.5/build/linux/CMakeFiles/CMakeOutput.log".
See also "/home/test/Downloads/x265-2.5/build/linux/CMakeFiles/CMakeError.log".
NASMのインストール
Index of /pub/nasm/stableより、最新版のNASMをダウンロードする。
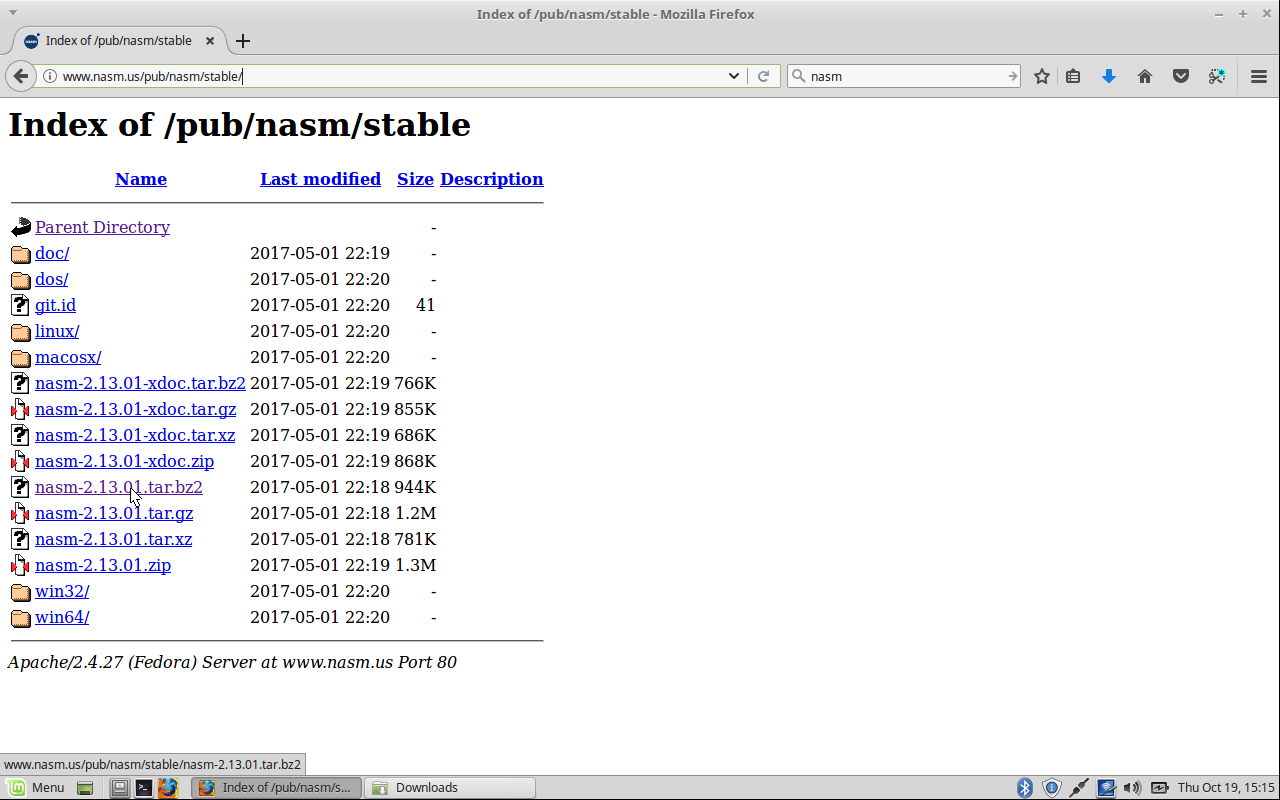
xdoc と付いているものはマニュアルなので注意。
2020-05-01 00:23:58 +0000 現在、2.13.01
ダウンロードしたものを解凍し、configureを行う。
$ tar xjvf nasm-2.13.01.tar.bz2
$ cd nasm-2.13.01/
$ ./configure
configure が成功したらmakeでビルド、後にmake installでインストールする。
$ make
$ sudo make install
YASMのコンパイル及びインストール
Download - The Yasm Modular Assembler Project から Latest Release のソースコードをダウンロードして解凍。
$ tar xvf yasm-1.3.0.tar.gz
configure、make、make install
$ ./configure
$ make
$ sudo make install
make  install-recursive
make[1]: Entering directory '/home/test/Downloads/yasm-1.3.0'
Making install in po
make[2]: Entering directory '/home/test/Downloads/yasm-1.3.0/po'
if test "yasm" = "gettext-tools"; then \
  /bin/mkdir -p /usr/local/share/gettext/po; \
  for file in Makefile.in.in remove-potcdate.sin quot.sed boldquot.sed en@quot.header en@boldquot.header insert-header.sin Rules-quot   Makevars.template; do \
    /usr/bin/install -c -m 644 ./$file \
		    /usr/local/share/gettext/po/$file; \
  done; \
  for file in Makevars; do \
    rm -f /usr/local/share/gettext/po/$file; \
  done; \
else \
  : ; \
fi
make[2]: Leaving directory '/home/test/Downloads/yasm-1.3.0/po'
Making install in .
make[2]: Entering directory '/home/test/Downloads/yasm-1.3.0'
make[3]: Entering directory '/home/test/Downloads/yasm-1.3.0'
 /bin/mkdir -p '/usr/local/bin'
  /usr/bin/install -c yasm ytasm vsyasm '/usr/local/bin'
 /bin/mkdir -p '/usr/local/lib'
 /usr/bin/install -c -m 644  libyasm.a '/usr/local/lib'
 ( cd '/usr/local/lib' && ranlib libyasm.a )
make  install-exec-hook
make[4]: Entering directory '/home/test/Downloads/yasm-1.3.0'
make[4]: Nothing to be done for 'install-exec-hook'.
make[4]: Leaving directory '/home/test/Downloads/yasm-1.3.0'
 /bin/mkdir -p '/usr/local/include'
 /usr/bin/install -c -m 644 libyasm.h '/usr/local/include'
 /bin/mkdir -p '/usr/local/share/man/man1'
 /bin/mkdir -p '/usr/local/share/man/man1'
 /usr/bin/install -c -m 644 yasm.1 '/usr/local/share/man/man1'
 /bin/mkdir -p '/usr/local/share/man/man7'
 /usr/bin/install -c -m 644 yasm_arch.7 yasm_parsers.7 yasm_dbgfmts.7 yasm_objfmts.7 '/usr/local/share/man/man7'
 /bin/mkdir -p '/usr/local/share/man/man7'
 /bin/mkdir -p '/usr/local/include/libyasm'
 /usr/bin/install -c -m 644 libyasm/arch.h libyasm/assocdat.h libyasm/bitvect.h libyasm/bytecode.h libyasm/compat-queue.h libyasm/coretype.h libyasm/dbgfmt.h libyasm/errwarn.h libyasm/expr.h libyasm/file.h libyasm/floatnum.h libyasm/hamt.h libyasm/insn.h libyasm/intnum.h libyasm/inttree.h libyasm/linemap.h libyasm/listfmt.h libyasm/md5.h libyasm/module.h libyasm/objfmt.h libyasm/parser.h libyasm/phash.h libyasm/preproc.h libyasm/section.h libyasm/symrec.h libyasm/valparam.h libyasm/value.h '/usr/local/include/libyasm'
 /bin/mkdir -p '/usr/local/include'
 /usr/bin/install -c -m 644 libyasm-stdint.h '/usr/local/include'
make[3]: Leaving directory '/home/test/Downloads/yasm-1.3.0'
make[2]: Leaving directory '/home/test/Downloads/yasm-1.3.0'
make[1]: Leaving directory '/home/test/Downloads/yasm-1.3.0'
g++とccmakeのインストール
これらはパッケージのものを利用する。簡単。
sudo apt-get install g++ cmake-curses-gui
誤ったものをインストールした場合
汎用性がある問題なのでページを分けた。
動的リンクエラーを解消する
こちらも同様
ライブラリのインストール
libx264のインストール
stable 版をx264, the best H.264/AVC encoder - VideoLANからダウンロードして解凍する。
$ tar xjvf last_x264.tar.bz2
$ cd x264-snapshot-20171018-2245
In order to quickly compile your libx264, you can type the following commands in your shell:
# cd /my/path/where/i/keep/compiled/stuff
# git clone git://git.videolan.org/x264.git
# cd x264
# ./configure --enable-static --enable-shared
# make
# make install
# ldconfig
--enable-static --enable-sharedを付けないとライブラリが作成されず、
x264の実行ファイルのみが生成されてしまう。
$ ./configure --enable-static --enable-shared
platform:      X86_64
byte order:    little-endian
system:        LINUX
cli:           yes
libx264:       internal
shared:        yes
static:        yes
asm:           yes
interlaced:    yes
avs:           avxsynth
lavf:          no
ffms:          no
mp4:           no
gpl:           yes
thread:        posix
opencl:        yes
filters:       crop select_every
lto:           no
debug:         no
gprof:         no
strip:         no
PIC:           yes
bit depth:     8
chroma format: all

You can run 'make' or 'make fprofiled' now.
makeでコンパイル、make installでインストールする。
$ make
$ sudo make install
x265のコンパイル及びインストール
stable版をReleases · videolan/x265からダウンロードして解凍。
tar xzvf x265-2.5.tar.gz
Or use our shell script which runs cmake then opens the curses GUI to configure build options
- cd build/linux ; ./make-Makefiles.bash
- make
こう書いてあったので README.txt の方法でビルドする。
$ ./make-Makefiles.bash
-- cmake version 3.5.1
-- The CXX compiler identification is GNU 5.4.0
-- Check for working CXX compiler: /usr/bin/c++
-- Check for working CXX compiler: /usr/bin/c++ -- works
-- Detecting CXX compiler ABI info
-- Detecting CXX compiler ABI info - done
-- Detecting CXX compile features
-- Detecting CXX compile features - done
-- Detected x86_64 target processor
-- Could NOT find NUMA (missing:  NUMA_ROOT_DIR NUMA_INCLUDE_DIR NUMA_LIBRARY)
-- Looking for include file inttypes.h
-- Looking for include file inttypes.h - found
-- Performing Test CC_HAS_NO_STRICT_OVERFLOW
-- Performing Test CC_HAS_NO_STRICT_OVERFLOW - Success
-- Performing Test CC_HAS_NO_NARROWING
-- Performing Test CC_HAS_NO_NARROWING - Success
-- Performing Test CC_HAS_NO_ARRAY_BOUNDS
-- Performing Test CC_HAS_NO_ARRAY_BOUNDS - Success
-- Performing Test CC_HAS_FAST_MATH
-- Performing Test CC_HAS_FAST_MATH - Success
-- Performing Test CC_HAS_STACK_REALIGN
-- Performing Test CC_HAS_STACK_REALIGN - Success
-- Performing Test CC_HAS_FNO_EXCEPTIONS_FLAG
-- Performing Test CC_HAS_FNO_EXCEPTIONS_FLAG - Success
-- Found yasm: /usr/local/bin/yasm (found version "1.3.0")
-- Found Yasm 1.3.0 to build assembly primitives
-- x265 version 0.0
-- The ASM_YASM compiler identification is unknown
-- Found assembler: /usr/local/bin/yasm
-- Looking for strtok_r
-- Looking for strtok_r - found
-- Looking for include file getopt.h
-- Looking for include file getopt.h - found
-- Configuring done
-- Generating done
-- Build files have been written to: /home/test/Downloads/x265-2.5/build/linux
終わりにGUIでコンパイルオプションが指定できる。特に変更が必要なオプションはない。
make、make install
$ make
$ sudo make install
[ 61%] Built target common
[ 85%] Built target encoder
[ 86%] Built target x265-shared
[ 87%] Built target x265-static
[100%] Built target cli
Install the project...
-- Install configuration: "Release"
-- Installing: /usr/local/lib/libx265.a
-- Installing: /usr/local/include/x265.h
-- Installing: /usr/local/include/x265_config.h
-- Installing: /usr/local/lib/libx265.so.130
-- Installing: /usr/local/lib/libx265.so
-- Installing: /usr/local/lib/pkgconfig/x265.pc
-- Installing: /usr/local/bin/x265
-- Set runtime path of "/usr/local/bin/x265" to ""
fdk-aacのコンパイル、インストール
opencore-amr - Browse /fdk-aac at SourceForge.net からダウンロードして解凍する。
$ tar xzvf fdk-aac-0.1.5.tar.gz
configure、make、make install
$ ./configure
$ make
$ sudo make install
[sudo] password for test:
make[1]: Entering directory '/home/test/Downloads/fdk-aac-0.1.5'
 /bin/mkdir -p '/usr/local/lib'
 /bin/bash ./libtool   --mode=install /usr/bin/install -c   libfdk-aac.la '/usr/local/lib'
libtool: install: /usr/bin/install -c .libs/libfdk-aac.so.1.0.0 /usr/local/lib/libfdk-aac.so.1.0.0
libtool: install: (cd /usr/local/lib && { ln -s -f libfdk-aac.so.1.0.0 libfdk-aac.so.1 || { rm -f libfdk-aac.so.1 && ln -s libfdk-aac.so.1.0.0 libfdk-aac.so.1; }; })
libtool: install: (cd /usr/local/lib && { ln -s -f libfdk-aac.so.1.0.0 libfdk-aac.so || { rm -f libfdk-aac.so && ln -s libfdk-aac.so.1.0.0 libfdk-aac.so; }; })
libtool: install: /usr/bin/install -c .libs/libfdk-aac.lai /usr/local/lib/libfdk-aac.la
libtool: install: /usr/bin/install -c .libs/libfdk-aac.a /usr/local/lib/libfdk-aac.a
libtool: install: chmod 644 /usr/local/lib/libfdk-aac.a
libtool: install: ranlib /usr/local/lib/libfdk-aac.a
libtool: finish: PATH="/usr/local/sbin:/usr/local/bin:/usr/sbin:/usr/bin:/sbin:/bin:/snap/bin:/sbin" ldconfig -n /usr/local/lib
----------------------------------------------------------------------
Libraries have been installed in:
   /usr/local/lib

If you ever happen to want to link against installed libraries
in a given directory, LIBDIR, you must either use libtool, and
specify the full pathname of the library, or use the '-LLIBDIR'
flag during linking and do at least one of the following:
   - add LIBDIR to the 'LD_LIBRARY_PATH' environment variable
     during execution
   - add LIBDIR to the 'LD_RUN_PATH' environment variable
     during linking
   - use the '-Wl,-rpath -Wl,LIBDIR' linker flag
   - have your system administrator add LIBDIR to '/etc/ld.so.conf'

See any operating system documentation about shared libraries for
more information, such as the ld(1) and ld.so(8) manual pages.
----------------------------------------------------------------------
 /bin/mkdir -p '/usr/local/include/fdk-aac'
 /usr/bin/install -c -m 644 ./libSYS/include/machine_type.h ./libSYS/include/genericStds.h ./libSYS/include/FDK_audio.h ./libAACenc/include/aacenc_lib.h ./libAACdec/include/aacdecoder_lib.h '/usr/local/include/fdk-aac'
 /bin/mkdir -p '/usr/local/lib/pkgconfig'
 /usr/bin/install -c -m 644 fdk-aac.pc '/usr/local/lib/pkgconfig'
make[1]: Leaving directory '/home/test/Downloads/fdk-aac-0.1.5'
opus codecのコンパイル、インストール
Downloads – Opus Codecから stable release のソースコードをダウンロード、解凍する。
$ tar xzvf opus-1.2.1.tar.gz
configure、make、make install
$ ./configure
$ make
$ make install
make  install-recursive
make[1]: Entering directory '/home/test/Downloads/opus-1.2.1'
make[2]: Entering directory '/home/test/Downloads/opus-1.2.1'
make[3]: Entering directory '/home/test/Downloads/opus-1.2.1/doc'
make[3]: Nothing to be done for 'all'.
make[3]: Leaving directory '/home/test/Downloads/opus-1.2.1/doc'
make[3]: Entering directory '/home/test/Downloads/opus-1.2.1'
 /bin/mkdir -p '/usr/local/lib'
 /bin/bash ./libtool   --mode=install /usr/bin/install -c   libopus.la '/usr/local/lib'
libtool: install: /usr/bin/install -c .libs/libopus.so.0.6.1 /usr/local/lib/libopus.so.0.6.1
libtool: install: (cd /usr/local/lib && { ln -s -f libopus.so.0.6.1 libopus.so.0 || { rm -f libopus.so.0 && ln -s libopus.so.0.6.1 libopus.so.0; }; })
libtool: install: (cd /usr/local/lib && { ln -s -f libopus.so.0.6.1 libopus.so || { rm -f libopus.so && ln -s libopus.so.0.6.1 libopus.so; }; })
libtool: install: /usr/bin/install -c .libs/libopus.lai /usr/local/lib/libopus.la
libtool: install: /usr/bin/install -c .libs/libopus.a /usr/local/lib/libopus.a
libtool: install: chmod 644 /usr/local/lib/libopus.a
libtool: install: ranlib /usr/local/lib/libopus.a
libtool: finish: PATH="/usr/local/sbin:/usr/local/bin:/usr/sbin:/usr/bin:/sbin:/bin:/snap/bin:/sbin" ldconfig -n /usr/local/lib
----------------------------------------------------------------------
Libraries have been installed in:
   /usr/local/lib

If you ever happen to want to link against installed libraries
in a given directory, LIBDIR, you must either use libtool, and
specify the full pathname of the library, or use the '-LLIBDIR'
flag during linking and do at least one of the following:
   - add LIBDIR to the 'LD_LIBRARY_PATH' environment variable
     during execution
   - add LIBDIR to the 'LD_RUN_PATH' environment variable
     during linking
   - use the '-Wl,-rpath -Wl,LIBDIR' linker flag
   - have your system administrator add LIBDIR to '/etc/ld.so.conf'

See any operating system documentation about shared libraries for
more information, such as the ld(1) and ld.so(8) manual pages.
----------------------------------------------------------------------
make[4]: Entering directory '/home/test/Downloads/opus-1.2.1/doc'
make[5]: Entering directory '/home/test/Downloads/opus-1.2.1/doc'
make[5]: Nothing to be done for 'install-exec-am'.
make[5]: Nothing to be done for 'install-data-am'.
make[5]: Leaving directory '/home/test/Downloads/opus-1.2.1/doc'
make[4]: Leaving directory '/home/test/Downloads/opus-1.2.1/doc'
 /bin/mkdir -p '/usr/local/share/aclocal'
 /usr/bin/install -c -m 644 opus.m4 '/usr/local/share/aclocal'
 /bin/mkdir -p '/usr/local/lib/pkgconfig'
 /usr/bin/install -c -m 644 opus.pc '/usr/local/lib/pkgconfig'
 /bin/mkdir -p '/usr/local/include/opus'
 /usr/bin/install -c -m 644 include/opus.h include/opus_multistream.h include/opus_types.h include/opus_defines.h '/usr/local/include/opus'
make[3]: Leaving directory '/home/test/Downloads/opus-1.2.1'
make[2]: Leaving directory '/home/test/Downloads/opus-1.2.1'
make[1]: Leaving directory '/home/test/Downloads/opus-1.2.1'
ALSAのインストール
ALSA support isn’t inherently built into
ffmpeg. You need to have the ALSA development files installed at./configuretime when buildingffmpeg.The
ffmpegconfigure script looks foralsa/asoundlib.handlibasound. If either is missing, it simply won’t build ALSA support into the program.
Short answer
run:
sudo apt-get install libasound2-devbefore attempting to configure and compile ffmpeg or anything where you need alsa support.
Process for resolving similar build dependencies:
Returning to this build/install method:
$ cd /usr/src
$ sudo git clone git://source.ffmpeg.org/ffmpeg.git
$ cd ffmpeg/
$ sudo ./configure && sudo make && sudo make install
the last line is a compaction of three steps, and the first one is significant as
configureestablishes what optional features the binary will support.It is normal to change system libraries and configuration options and rerun
configuremany times until you are happy with its results.The output you want is “alsa” as a supported indev (and probably outdev.)
./configure
  ... no alsa ..
./configure --help
./configure --list-indevs
./configure --enable-indev=alsa --enable-outdev=alsa
  ... no alsa .. so it is not just off by default..
grep alsa configure
      alsa_asoundlib_h
      alsa
  alsa_indev_deps="alsa"
  alsa_outdev_deps="alsa"
  enabled_any alsa_indev alsa_outdev &&
      check_lib alsa alsa/asoundlib.h snd_pcm_htimestamp -lasound
this leads to why configure is not supporting alsa, and looking up asoundlib.h goes here though you could also query the packaging db.
sudo apt-get install libasound2-dev
./configure
 ... alsa! ..
./make
./ffmpeg -formats |grep alsa
 ...  DE alsa! .. (the D/E columns indicate both directions are working)
./make install
asoundlib.h がないとavconvでALSAが有効にならない。
そして asoundlib.h は libasound2-dev に入っている。
libasound2-dev を探してインストールする。
$ apt-cache search libasound
libasound2-dev - shared library for ALSA applications -- development files
$ sudo apt-get install libasound2-dev
libavのインストール
Libavから最新版をダウンロード、解凍。
$ tar xzvf libav-12.2.tar.gz
configure
$ ./configure --enable-gpl --enable-nonfree --enable-libx264 --enable-libx265 --enable-libfdk-aac
...
External libraries:
libfdk_aac                libx264                   libx265
...
Enabled indevs:
alsa                      dv1394                    fbdev
oss                       v4l2

Enabled outdevs:
alsa                      oss
ALSA、libx264、libx265、libfdk_aacが有効になっているか確認する。
make をしてみるとエラーで止まることがある。
@@ -874,12 +895,14 @@ static const enum AVPixelFormat pix_fmts_8bit_rgb[] = {

 static av_cold void X264_init_static(AVCodec *codec)
 {
-    if (x264_bit_depth == 8)
+    if (X264_BIT_DEPTH == 8)
         codec->pix_fmts = pix_fmts_8bit;
-    else if (x264_bit_depth == 9)
+    else if (X264_BIT_DEPTH == 9)
         codec->pix_fmts = pix_fmts_9bit;
-    else if (x264_bit_depth == 10)
+    else if (X264_BIT_DEPTH == 10)
         codec->pix_fmts = pix_fmts_10bit;
+    else /* X264_BIT_DEPTH == 0 */
+        codec->pix_fmts = pix_fmts;
 }
libavcodec/libx264.c ファイル内の変数が大文字に変更になったみたいなので変更する。
--- a/libavcodec/libfdk-aacenc.c	2018-09-05 22:28:50.071703112 +0930
+++ b/libavcodec/libfdk-aacenc.c	2018-09-05 22:30:05.183907088 +0930
@@ -290,7 +290,11 @@
     }

     avctx->frame_size = info.frameLength;
+#if AACENCODER_LIB_VL0 < 4
     avctx->initial_padding = info.encoderDelay;
+#else
+    avctx->initial_padding = info.nDelay;
+#endif
     ff_af_queue_init(avctx, &s->afq);

     if (avctx->flags & AV_CODEC_FLAG_GLOBAL_HEADER) {
libfdk-aacenc.c も最新版で変数名が変更されたようなので、これに変更をする。
この2点の修正で make が通るようになった!
make install
$ make
$ sudo make install
INSTALL	doc/avconv.1
INSTALL	doc/avprobe.1
INSTALL	install-progs-yes
INSTALL	avconv
INSTALL	avprobe
INSTALL	presets/libx264-lossless_slower.avpreset
INSTALL	presets/libx264-faster.avpreset
INSTALL	presets/libx264-lossless_max.avpreset
INSTALL	presets/libvpx-1080p.avpreset
INSTALL	presets/libx264-medium_firstpass.avpreset
INSTALL	presets/libx264-baseline.avpreset
INSTALL	presets/libvpx-720p50_60.avpreset
INSTALL	presets/libx264-lossless_ultrafast.avpreset
INSTALL	presets/libx264-placebo_firstpass.avpreset
INSTALL	presets/libx264-lossless_fast.avpreset
INSTALL	presets/libvpx-360p.avpreset
INSTALL	presets/libx264-veryfast.avpreset
INSTALL	presets/libx264-medium.avpreset
INSTALL	presets/libx264-veryslow.avpreset
INSTALL	presets/libx264-veryslow_firstpass.avpreset
INSTALL	presets/libx264-placebo.avpreset
INSTALL	presets/libx264-slow_firstpass.avpreset
INSTALL	presets/libx264-ipod320.avpreset
INSTALL	presets/libx264-slower_firstpass.avpreset
INSTALL	presets/libvpx-720p.avpreset
INSTALL	presets/libx264-ultrafast_firstpass.avpreset
INSTALL	presets/libx264-ipod640.avpreset
INSTALL	presets/libx264-faster_firstpass.avpreset
INSTALL	presets/libx264-slow.avpreset
INSTALL	presets/libx264-superfast_firstpass.avpreset
INSTALL	presets/libx264-lossless_medium.avpreset
INSTALL	presets/libx264-slower.avpreset
INSTALL	presets/libx264-main.avpreset
INSTALL	presets/libx264-ultrafast.avpreset
INSTALL	presets/libx264-superfast.avpreset
INSTALL	presets/libvpx-1080p50_60.avpreset
INSTALL	presets/libx264-veryfast_firstpass.avpreset
INSTALL	presets/libx264-lossless_slow.avpreset
INSTALL	presets/libx264-fast.avpreset
INSTALL	presets/libx264-fast_firstpass.avpreset
INSTALL	libavdevice/libavdevice.a
INSTALL	libavfilter/libavfilter.a
INSTALL	libavformat/libavformat.a
INSTALL	libavcodec/libavcodec.a
INSTALL	libavresample/libavresample.a
INSTALL	libswscale/libswscale.a
INSTALL	libavutil/libavutil.a
INSTALL	libavdevice/avdevice.h
INSTALL	libavdevice/version.h
INSTALL	libavdevice/libavdevice.pc
INSTALL	libavfilter/avfilter.h
INSTALL	libavfilter/avfiltergraph.h
INSTALL	libavfilter/buffersink.h
INSTALL	libavfilter/buffersrc.h
INSTALL	libavfilter/version.h
INSTALL	libavfilter/libavfilter.pc
INSTALL	libavformat/avformat.h
INSTALL	libavformat/avio.h
INSTALL	libavformat/version.h
INSTALL	libavformat/libavformat.pc
INSTALL	libavcodec/avcodec.h
INSTALL	libavcodec/avfft.h
INSTALL	libavcodec/d3d11va.h
INSTALL	libavcodec/dirac.h
INSTALL	libavcodec/dv_profile.h
INSTALL	libavcodec/dxva2.h
INSTALL	libavcodec/qsv.h
INSTALL	libavcodec/vaapi.h
INSTALL	libavcodec/vda.h
INSTALL	libavcodec/vdpau.h
INSTALL	libavcodec/version.h
INSTALL	libavcodec/vorbis_parser.h
INSTALL	libavcodec/xvmc.h
INSTALL	libavcodec/libavcodec.pc
INSTALL	libavresample/avresample.h
INSTALL	libavresample/version.h
INSTALL	libavresample/libavresample.pc
INSTALL	libswscale/swscale.h
INSTALL	libswscale/version.h
INSTALL	libswscale/libswscale.pc
INSTALL	libavutil/adler32.h
INSTALL	libavutil/aes.h
INSTALL	libavutil/attributes.h
INSTALL	libavutil/audio_fifo.h
INSTALL	libavutil/avassert.h
INSTALL	libavutil/avstring.h
INSTALL	libavutil/avutil.h
INSTALL	libavutil/base64.h
INSTALL	libavutil/blowfish.h
INSTALL	libavutil/bswap.h
INSTALL	libavutil/buffer.h
INSTALL	libavutil/channel_layout.h
INSTALL	libavutil/common.h
INSTALL	libavutil/cpu.h
INSTALL	libavutil/crc.h
INSTALL	libavutil/dict.h
INSTALL	libavutil/display.h
INSTALL	libavutil/downmix_info.h
INSTALL	libavutil/error.h
INSTALL	libavutil/eval.h
INSTALL	libavutil/fifo.h
INSTALL	libavutil/file.h
INSTALL	libavutil/frame.h
INSTALL	libavutil/hmac.h
INSTALL	libavutil/hwcontext.h
INSTALL	libavutil/hwcontext_cuda.h
INSTALL	libavutil/hwcontext_dxva2.h
INSTALL	libavutil/hwcontext_qsv.h
INSTALL	libavutil/hwcontext_vaapi.h
INSTALL	libavutil/hwcontext_vdpau.h
INSTALL	libavutil/imgutils.h
INSTALL	libavutil/intfloat.h
INSTALL	libavutil/intreadwrite.h
INSTALL	libavutil/lfg.h
INSTALL	libavutil/log.h
INSTALL	libavutil/macros.h
INSTALL	libavutil/mathematics.h
INSTALL	libavutil/md5.h
INSTALL	libavutil/mem.h
INSTALL	libavutil/opt.h
INSTALL	libavutil/parseutils.h
INSTALL	libavutil/pixdesc.h
INSTALL	libavutil/pixfmt.h
INSTALL	libavutil/random_seed.h
INSTALL	libavutil/rational.h
INSTALL	libavutil/replaygain.h
INSTALL	libavutil/samplefmt.h
INSTALL	libavutil/sha.h
INSTALL	libavutil/stereo3d.h
INSTALL	libavutil/time.h
INSTALL	libavutil/version.h
INSTALL	libavutil/xtea.h
INSTALL	libavutil/lzo.h
INSTALL	libavutil/avconfig.h
INSTALL	libavutil/libavutil.pc
インストール完了!!
使い方
$ avconv -i /dev/video0 -f video4linux2 -list_formats all
avconv version 12.2, Copyright (c) 2000-2017 the Libav developers
  built on Oct 21 2017 23:09:27 with gcc 5.4.0 (Ubuntu 5.4.0-6ubuntu1~16.04.5) 20160609
Trailing options were found on the commandline.
/dev/video0: Invalid argument
と怒られたので調べたら
Basic FFmpeg syntax structure is
ffmpeg -<options for input 1> -i input 1 -<options for input 2> -i input 2 -<options for output 1> output1 -<options for output 2> output2
最初にオプションを指定し、最後にインターフェイスを指定するようだ。
$ avconv -f video4linux2 -list_formats all -i /dev/video0
avconv version 12.2, Copyright (c) 2000-2017 the Libav developers
  built on Oct 21 2017 23:09:27 with gcc 5.4.0 (Ubuntu 5.4.0-6ubuntu1~16.04.5) 20160609
[video4linux2 @ 0x3144d60] R :   yuyv422 :           YUYV 4:2:2 : 160x120 176x144 320x240 352x288 640x480 1280x720
[video4linux2 @ 0x3144d60] C :     mjpeg :          Motion-JPEG : 960x540 1024x576 1280x720
/dev/video0: Immediate exit requested
Technical Note
Linux Top
bmdtools & avconv関係
- hls 配信で生成され続ける動画ファイルを定期的に削除する
- 配信しているコマンドが、 ssh 脱出後でも動作し続けるようにする
- bmdtools: bmdcapture から avconv で HLS(HTTP Live Streaming)配信を行う
- avconvとWebカメラでHLS(HTTP Live Streaming)配信を行う
- avconvの使い方
- avconvでのALSAデバイス指定方法
- Linux: 利用できるオーディオデバイスの情報を取得する
- Linux: 利用できるWebカメラの情報を取得する
- bmdtools: bmdcaptureの使い方
- Linux: avconvをlibx264、libx265、alsaを利用できるようにしてビルドする
- bmdtoolsをコンパイルしてBlackmagic Design製品を扱う
- Linux で Blackmagic Design 製品を扱う